Unity is one of the most popular game engines worldwide and it is supported across a wide variety of platforms. Its editor is widely used by Windows and macOS users, but it is also compatible with linux.
However, setting up a working dev environment on linux is not as easy as it sounds : This article presents a step-by-step comprehensive guide with emphasis on some common pitfalls in order to succeed on setting up the environment.
Goals and Scope of this Guide
The goals of this guide are to install both Unity and Visual Studio Code on a pretty popular Linux distribution : Ubuntu. For the purpose of this guide, we will use Ubuntu 21.10 (Impish) 64-bit for PC (amd64).
The goals of the guide are:
-
Install Unity Editor for Linux (current 2020.3 LTS)
-
Install Visual Studio Code and libraries for Unity Development
-
Create a Unity Project
-
Setting up Visual Studio as IDE for your project
-
Ensure Intellisense is working
-
Ensure breakpoints and debugging are working
-
Note : This guide assumes you are already familiar with basic Linux concepts and are confident with command-line. Also, as it is not an introduction to unity, some of its concepts
Installing Unity Editor
Unity Editors are quite easy to install. In order to manage installations and projects : a launcher application named Unity Hub centralizes all into one AppImage.
You can download it for Linux from this webpage : Get Started with Unity - Download the Unity Hub and Install the Editor
Once downloaded, the UnityHubBeta.tar.gz can be extracted either from your files (Right Click > Extract Here) or using this command line in your download folder:
tar zxf UnityHubBeta.tar.gz
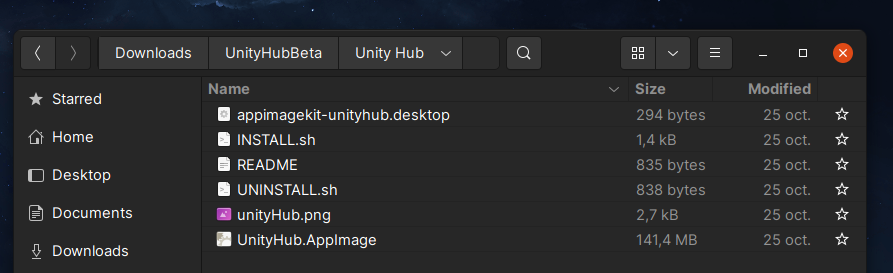
In this folder, we have two files of interest: INSTALL.sh and UNINSTALL.sh. These two files will be used to install or uninstall the Unity Hub
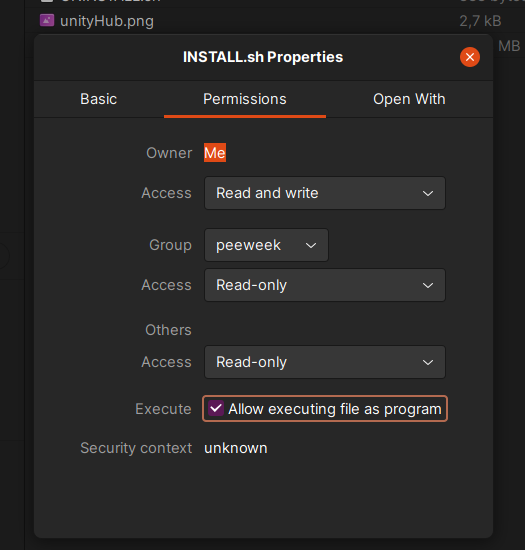
In order to install, we will need first to run the INSTALL shell script. But we need first to make it executable. We can either Right Click > Properties > Permissions and enable the Allow Executing file as Program. Or use the following command in a terminal:
chmod +x ./INSTALL.sh
Once enabled, you can run the installer using the following command:
peeweek@XXXX:~/Downloads/UnityHubBeta/Unity Hub$ ./INSTALL.sh
This script will only run if the UnityHub.AppImage is at the same location as this script
This will wipe any existing Unity Hub installations, are you willing to proceed? [N|y]: y
Integrating Unity Hub into system
Updating AppImage permissions
Moving AppImage to the Applications folder
Adding the necessary .desktop file
Adding the unity hub icon
Registering the required unityhub URL scheme with XDG
Installation complete.
Once completed, only 3 files shall remain in your install folder:
-
INSTALL.sh
-
README
-
UNINSTALL.sh
Please keep them in a safe place you want to uninstall/reinstall later.
Now, unity Hub is installed, and can be accessed from your applications, and add it as a favorite in your launcher bar.

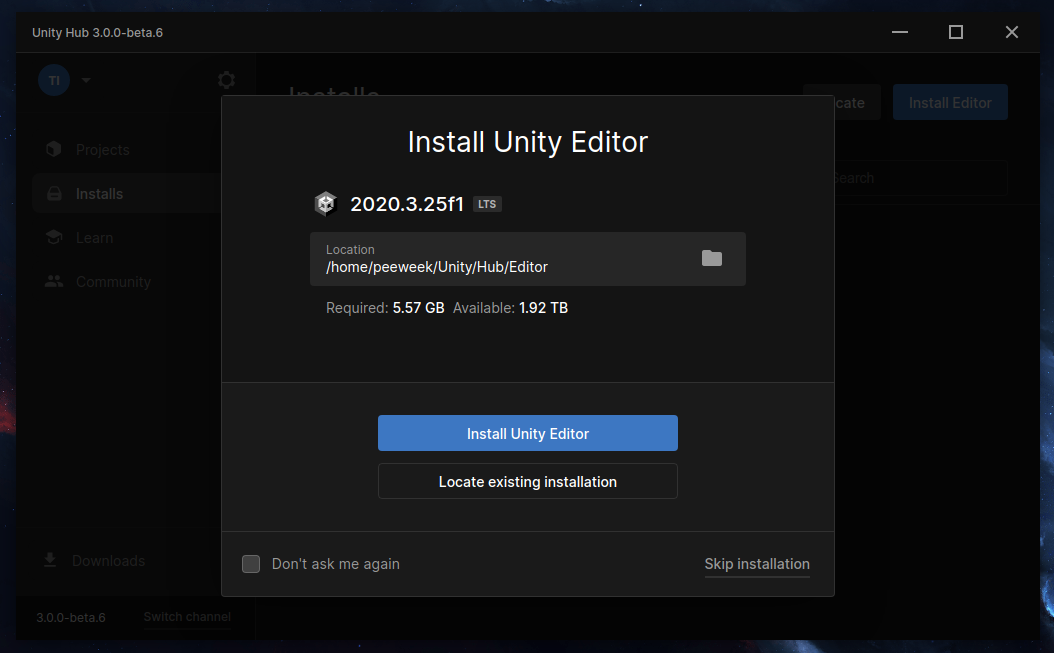
After Starting the Application, you will be promtped to create an account, choose from a paid license (if you have a pro license), or create a personal license (for revenues under $100’000). Then you will be able to download and install your first editor. The suggested version is always a good choice.
Once it has started installing, you can minimize the unity hub window. We will move on to the Visual Studio Install and set up.
Installing Visual Studio Code
The next part involves installing Visual Studio Code, an IDE from Microsoft that enables editing C# scripts from unity, but most importantly, attach to running instances and debug code.
In order to set that up correctly we need:
-
Visual Studio Code IDE
-
Mono runtime library (we will use
mono-complete) -
The Microsoft DotNET SDK
Visual Studio Code
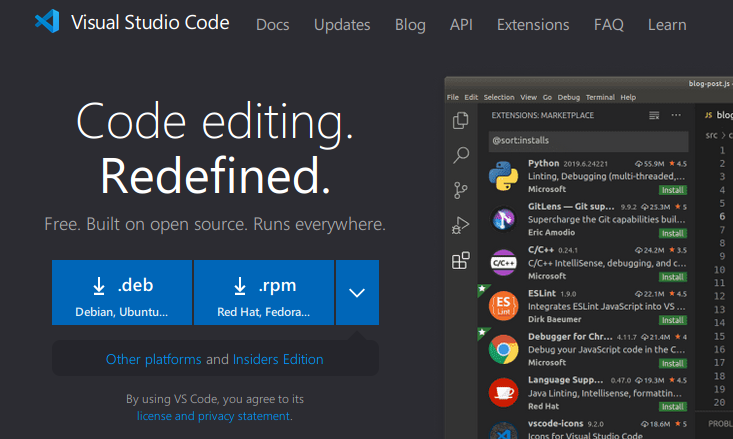
In order to install VS Code, I’ve chosen to use the manual install from microsoft website. As we are on Ubuntu, we need a .deb install package that can be acquired from this webpage: https://code.visualstudio.com/
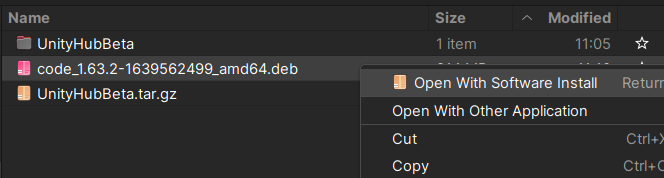
Let’s download and save the deb file in our Downloads folder. Then right click the deb file and select Open With Software Install.
 Then click the green install button.

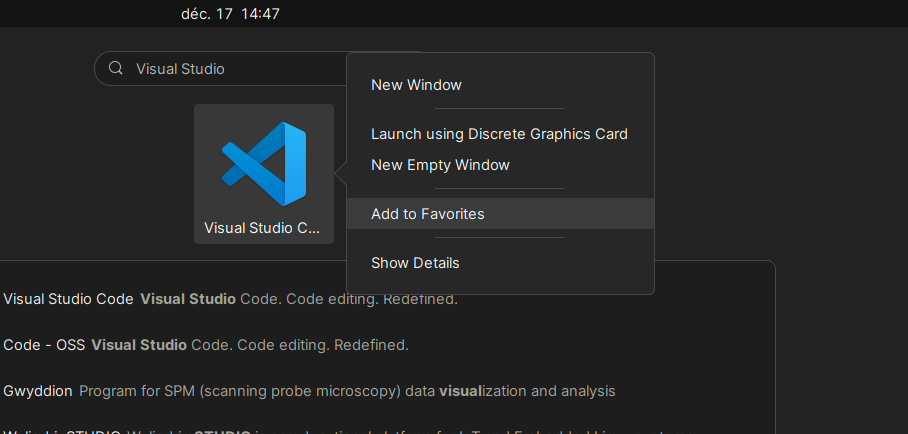
After installing, you can launch Visual Studio Code in your activities, and optionally add it to your favorites.
Mono and Dotnet-SDK
Before running Visual Studio Code, we will install additional libraries, first we will need to ensure we are up to date : let’s run the software updater, or run the following commands:
sudo apt-get update
sudo apt-get upgrade
Then, in a terminal, we can first install mono:
sudo apt-get install mono-complete
This package installs many packages and it can take a while. After installing you will be back to the shell and now you will be able to verify the mono installation
$ mono --version
Mono JIT compiler version 6.8.0.105 (Debian 6.8.0.105+dfsg-3.2 Wed Jun 30 05:34:49 UTC 2021)
Copyright (C) 2002-2014 Novell, Inc, Xamarin Inc and Contributors. www.mono-project.com
	TLS:           __thread
	SIGSEGV:       altstack

.....
Then, let’s hop onto DotNET SDK. This package is not hosted on the ubuntu APT repositories, but it can be found on the snap store. In order to install it please run
$ sudo snap install dotnet-sdk --classic
dotnet-sdk 6.0.101 from Microsoft .NET Core (dotnetcore✓) installed
Configure Visual Studio Code
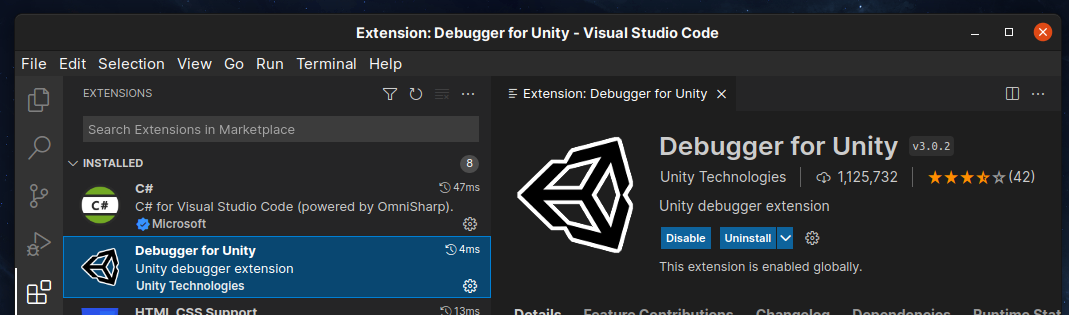
Now we have completed the install part, let’s open Visual Studio Code. On the left toolbar, let’s click the 5th icon from the top : Extensions
In the Extensions, please use the search to install the following extensions:
-
C# (Microsoft)
-
Debugger for Unity (Unity Technologies)
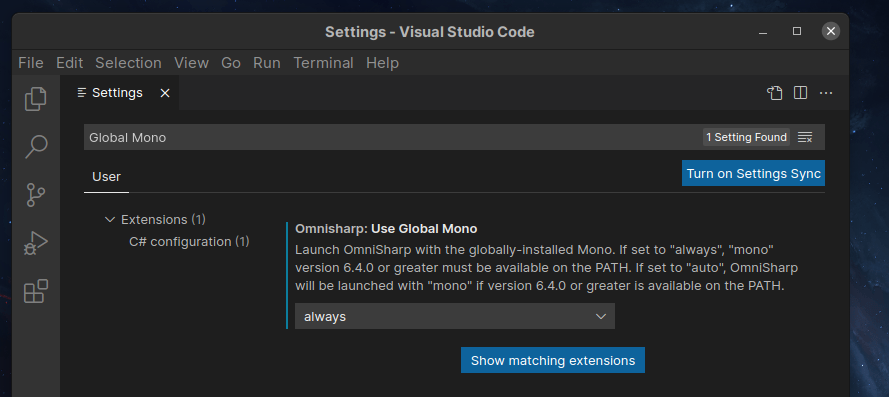
Once installed, please go into File > Preferences, and search for “Global Mono”. Ensure the “Omnisharp : Use Global Mono” setting is set to always.
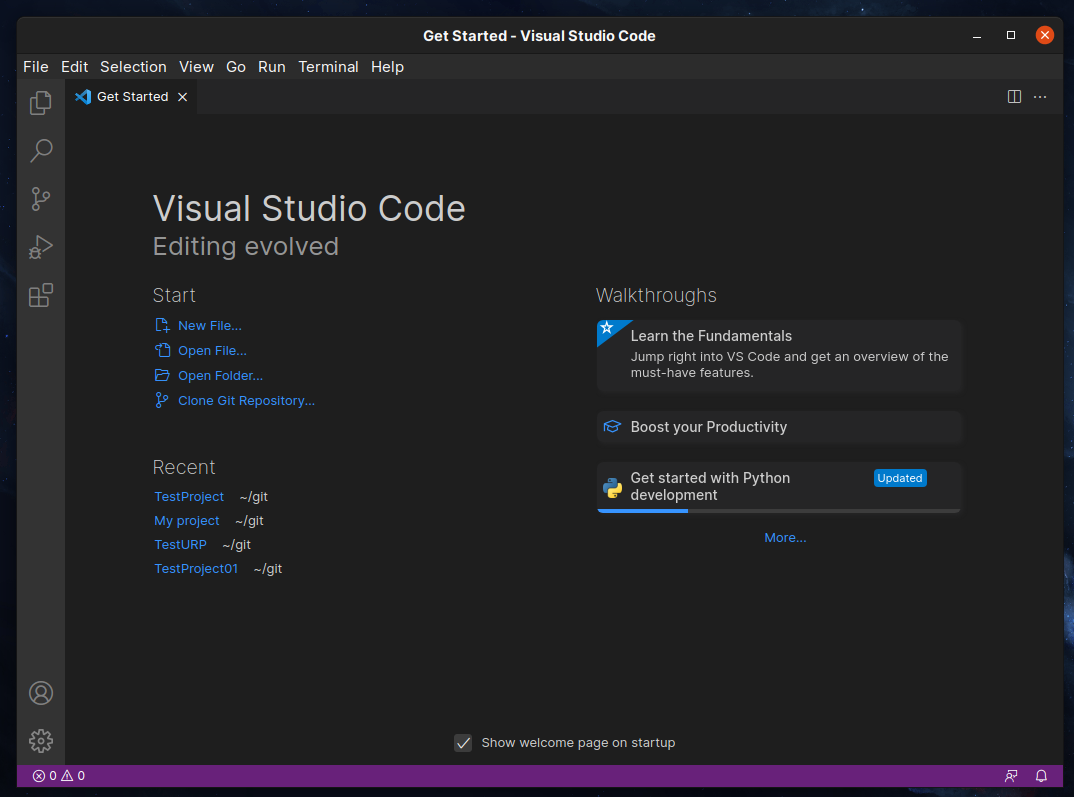
And we should be good to go! Now we can close Visual Studio and go back to Unity Hub.
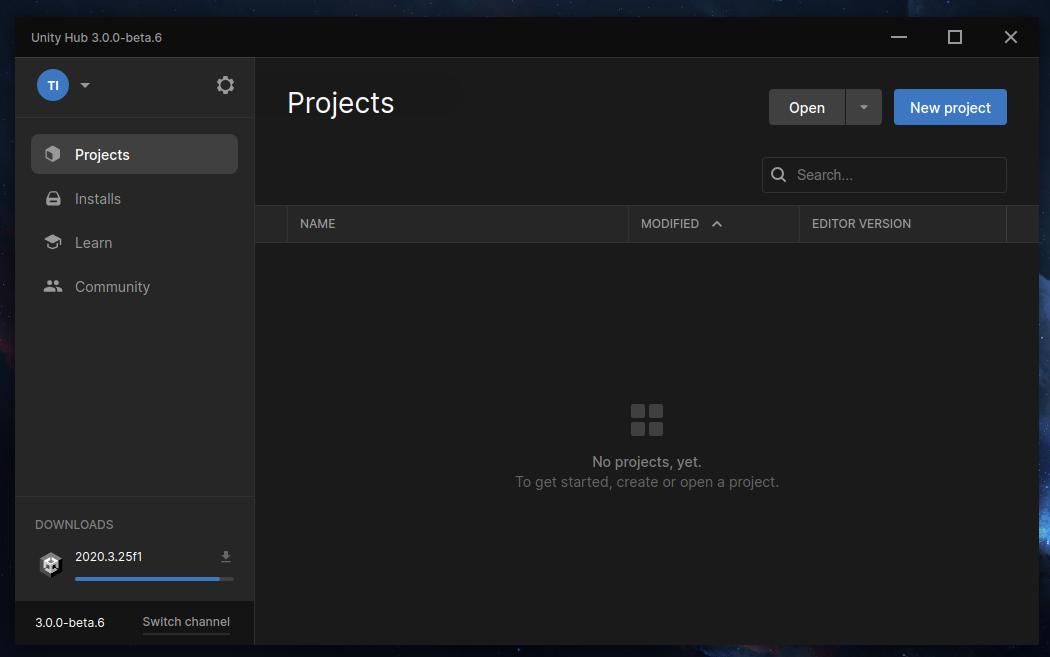
Creating the Unity Project
Back into Unity Hub, letś click the Projects button on the left toolbar. Then Click the New Project Button.
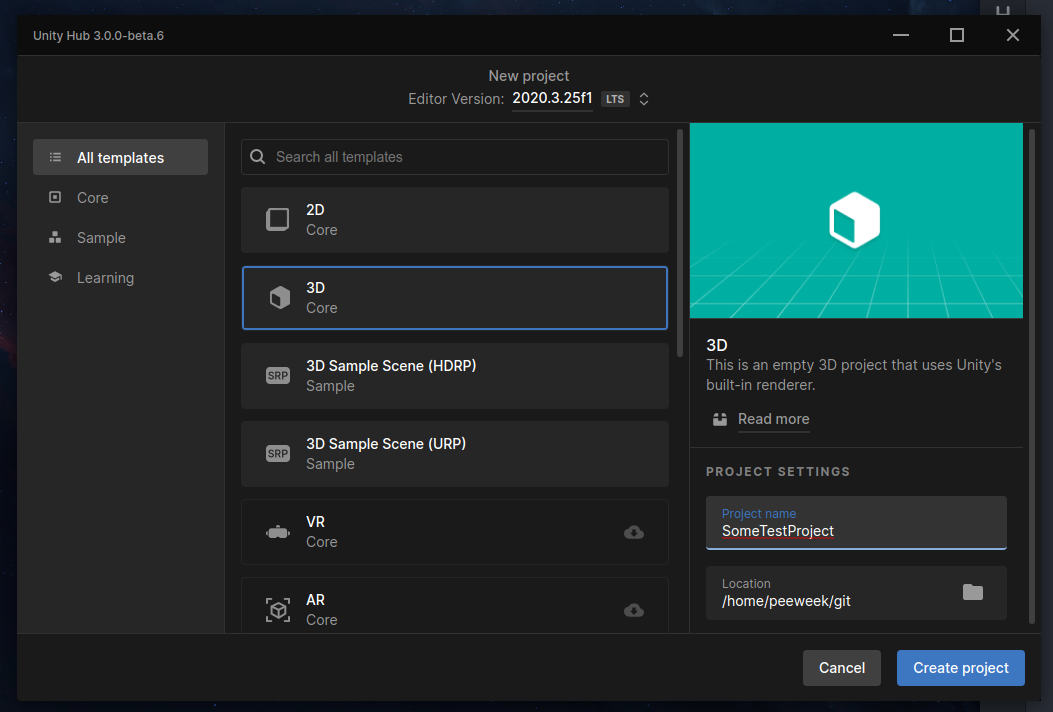
Now, we will create a new project for unity. There are many templates that can be used as a startup project, but for our example we will use the 3D Template. Let’s choose a name and folder for our project, then click Create Project blue button to continue.
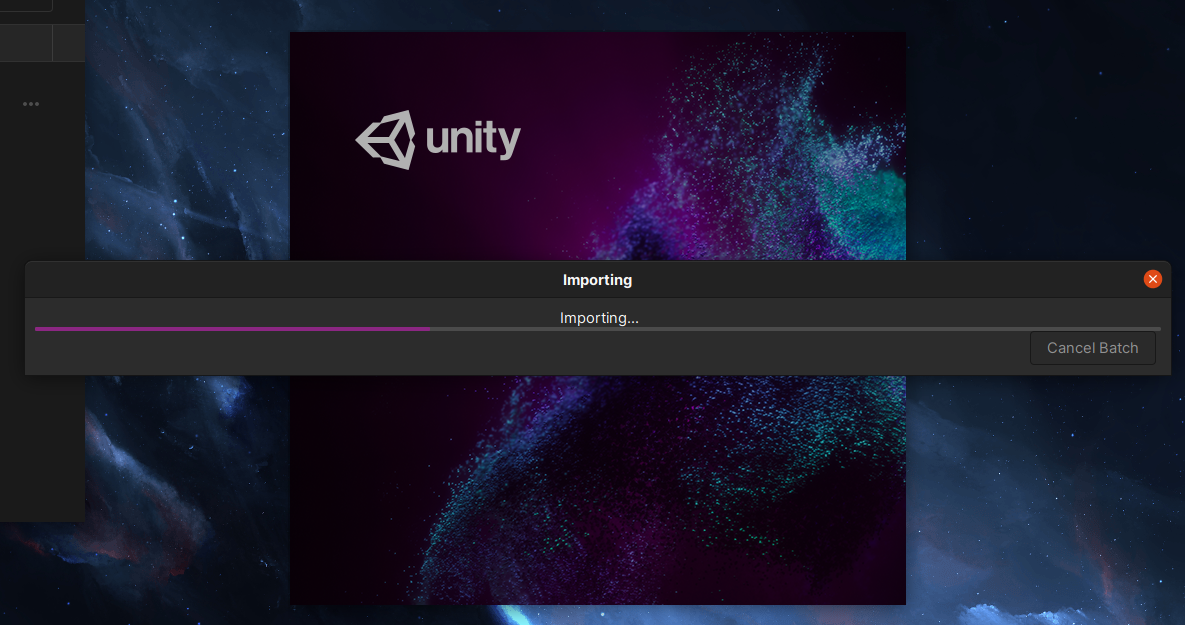
The project will then start loading, and importing. This takes a while for the first run.
After a while, the editor will open, and we will be now able to do some scripting.
Setting up Scripting
Now that we are in unity, we will first check that VS Code is correctly detected. Let’s open our preferences (Edit > Preferences), then navigate to the External Tools section.
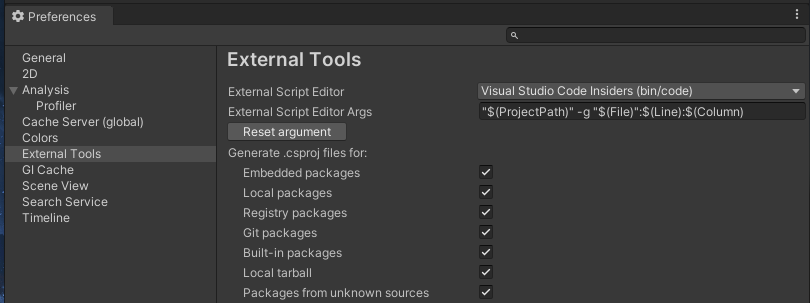
If Visual Studio code is detected, it should be available in the drop down for “External Script Editor” (Strangely it is referred to as VS Code Insiders for me). If is ok, you can check that the argument is correct (and optionally reset it using the button.). A good thing is also to enable the generation of the .csproj files.
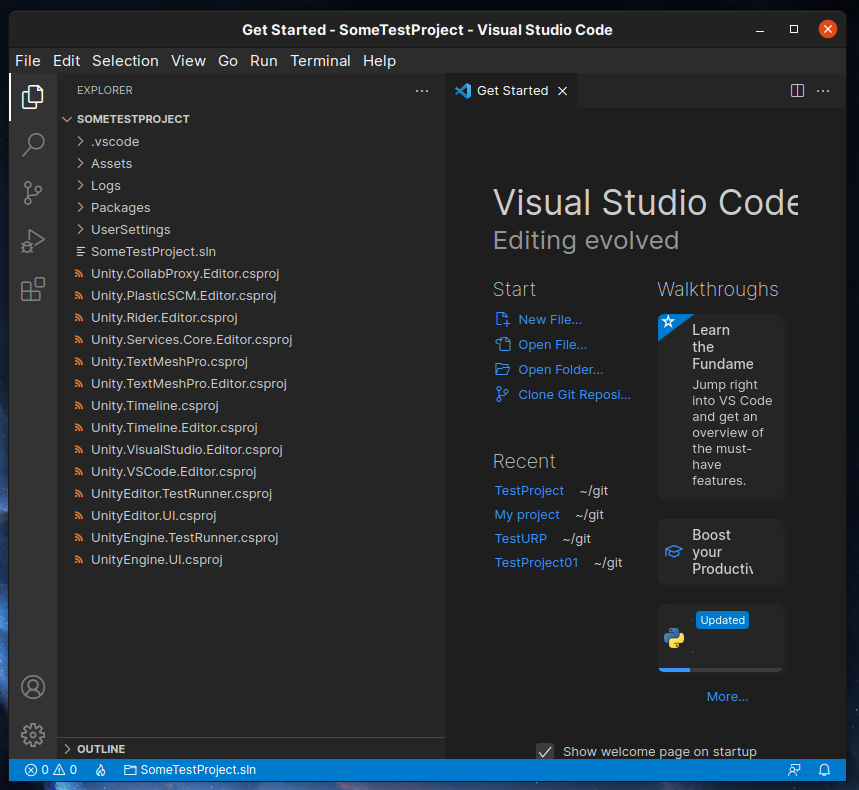
Once everything seems good, we can try opening the project using the Assets>Open C# Project menu. If everything is OK, you should see your project in the Explorer View.
Check Unity > Visual Studio connectivity
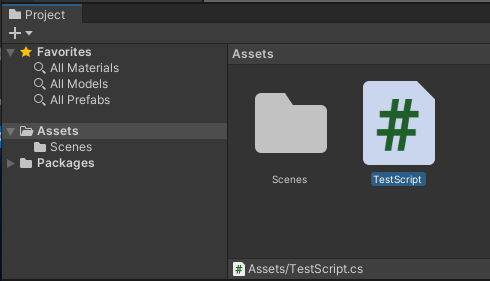
Now, we can close Visual Studio, and go back to unity, and let’s create a script : In the project window, navigate to the root of Assets, then right click in the empty space for files, and select Create/C# Script. Let’s name our file TestScript.
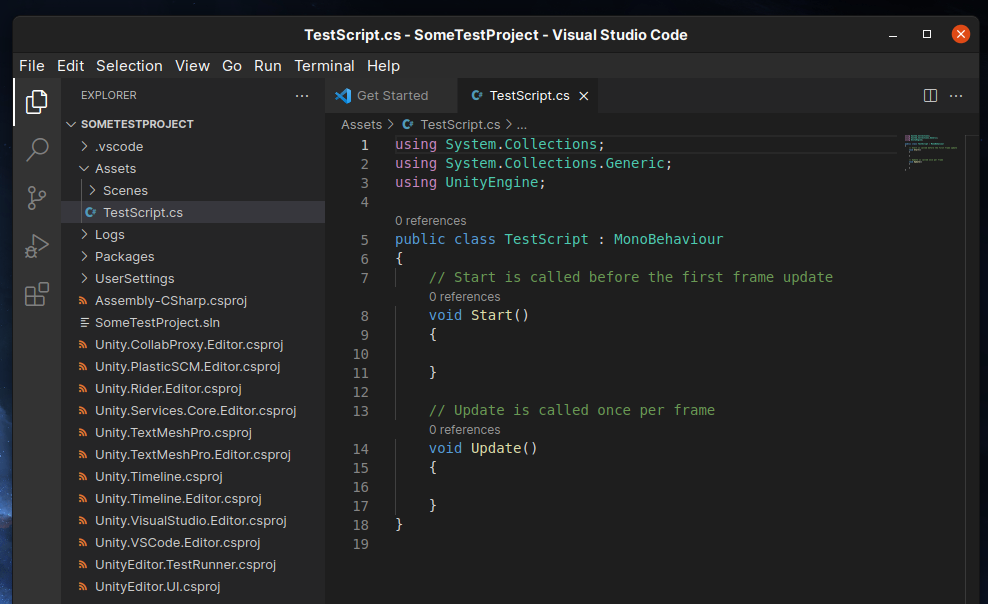
After some compilation, we can double click the file to open it in Visual Studio Code.
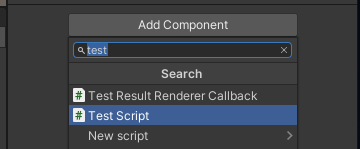
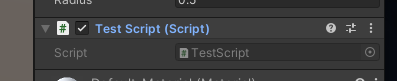
Back in unity, let’s create a sphere object in the scene : In the hierarchy window, click the + Button in the toolbar, and select 3D Object > Sphere. Then, with the sphere selected, use the Add Component button at the bottom of the inspector to add the Test Script we just created.
The Component should be added to the sphere.
Let’s go back to Visual Studio, and let’s modify the script so it looks like that:
using System.Collections;
using System.Collections.Generic;
using UnityEngine;

public class TestScript : MonoBehaviour
{
    void OnMouseDown()
    {
        Debug.Log("Clicked the Sphere!");
    }
}
Back in unity, let’s click the play button in the top toolbar. We shall be able to click the Play Button at the top, once playing, if we click the sphere we get the following messages in the console tab.
Clicked the Sphere!
UnityEngine.Debug:Log (object)
TestScript:OnMouseDown () (at Assets/TestScript.cs:9)
UnityEngine.SendMouseEvents:DoSendMouseEvents (int) (at /home/bokken/buildslave/unity/build/Modules/InputLegacy/MouseEvents.cs:161)
Once it is working, we can stop playing (Ctrl+P), and start making some breakpoints.
Setting up Breakpoints
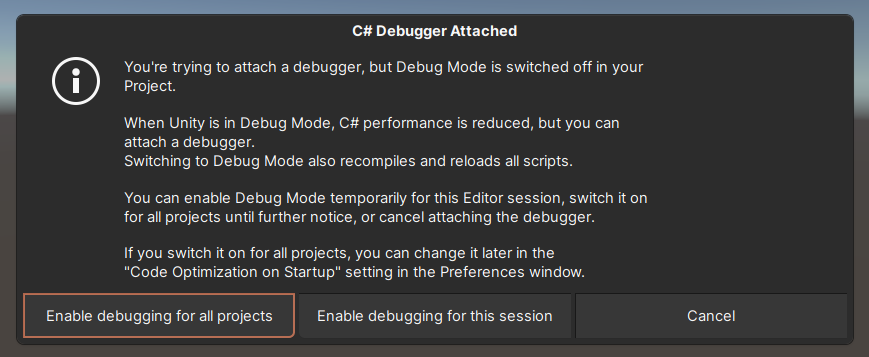
First, we will set Unity Editor into debug mode. To do so, in the bottom right corner, let’s click the Debug Mode button, and click “Switch to Debug Mode” if not already in debug mode.
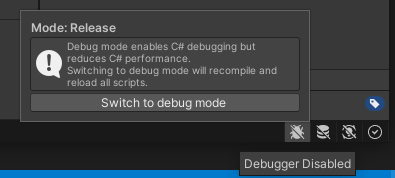
Once enabled, it will reload the scripts, and appear as a yellow bug icon (gray icon is for release mode.)
Once debug mode is enabled, we can then attach Visual Studio to Unity. Let’s go back to Visual Studio. Here is where it gets a bit tricky.
Note : the following instructions depicts some workarounds required as for December 2021, they will probably be solved in the future.
In Visual Studio, if we go to the debug tab (4th icon from the top in the left toolbar), then click Run and Debug we get this situation :
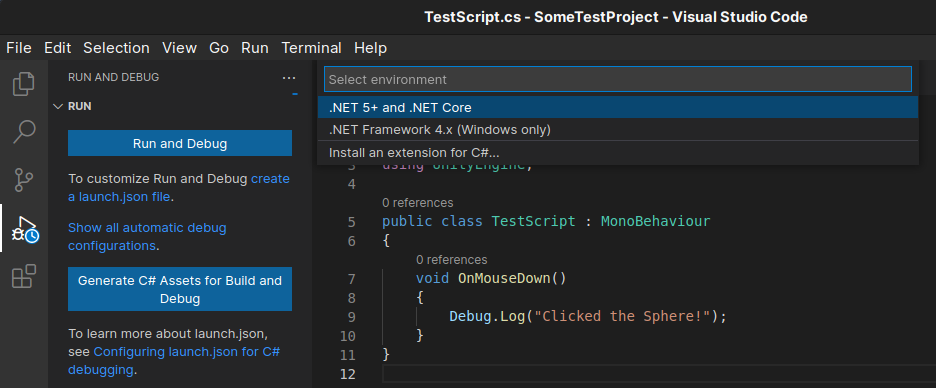
We are currently missing the entry to attach the Unity Debugger. And if we click the “Create a launch.json file” , we still don’t see the option.
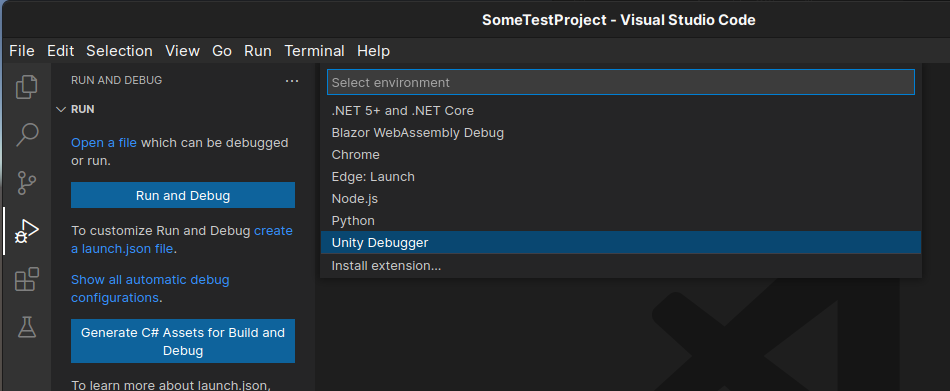
But wait! Now, let’s just close all opened files, then retry.
Once created, the launch.json will display some configurations. Let’s save it first. Then click the Green Play Button in the Left Pane.
We should have this error:
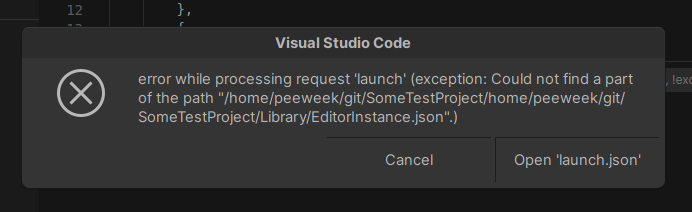
The problem here is that our editor configuration path is badly configured by Visual Studio.
We have an absolute path in the Editor Configuration
    "configurations": [
        {
            "name": "Unity Editor",
            "type": "unity",
            "path": "/home/peeweek/git/SomeTestProject/Library/EditorInstance.json",
            "request": "launch"
        },
While we should have a relative path:
    "configurations": [
        {
            "name": "Unity Editor",
            "type": "unity",
            "path": "Library/EditorInstance.json",
            "request": "launch"
        },
Clicking again, should try to attach to the editor. You should have a prompt from unity editor to switch to debug mode, let’s do so, either for all projects or for this session is fine.
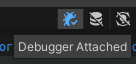
Once attached, you should have the debugger attached.
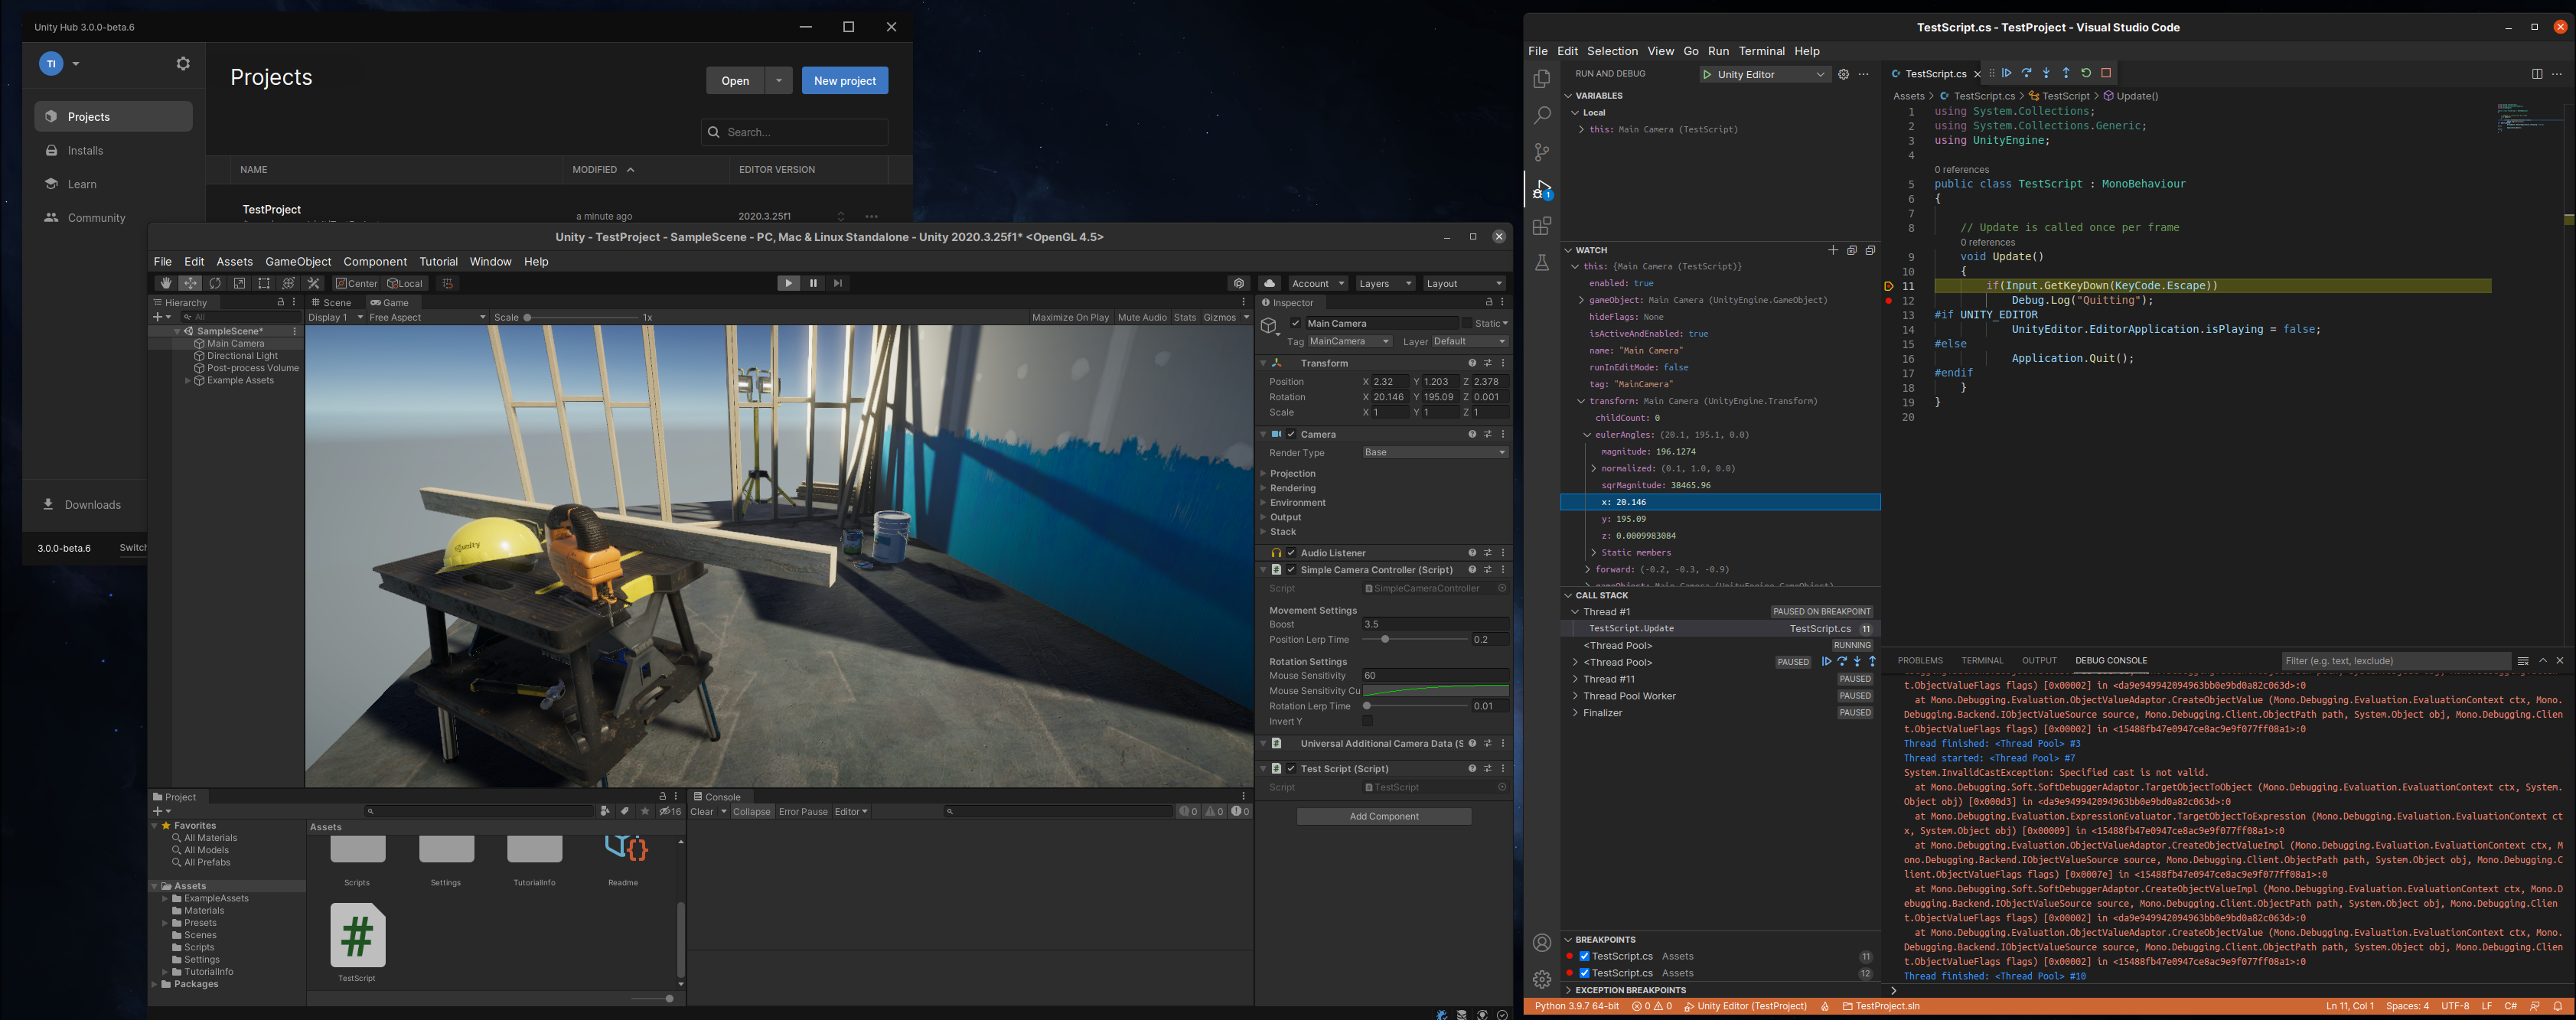
Going back to VS Code, let’s add a breakpoint to the Debug Log line.

Now, back at unity, let’s play, and click the sphere. We should reach the breakpoint.

Final Words, Takeaways
While this guide is a step by step and seem long, the install is not so complex but requires following directions thoroughly. It is yet, more complex to set up than a Windows dev environment, but we can hopefully see improvements in the future.