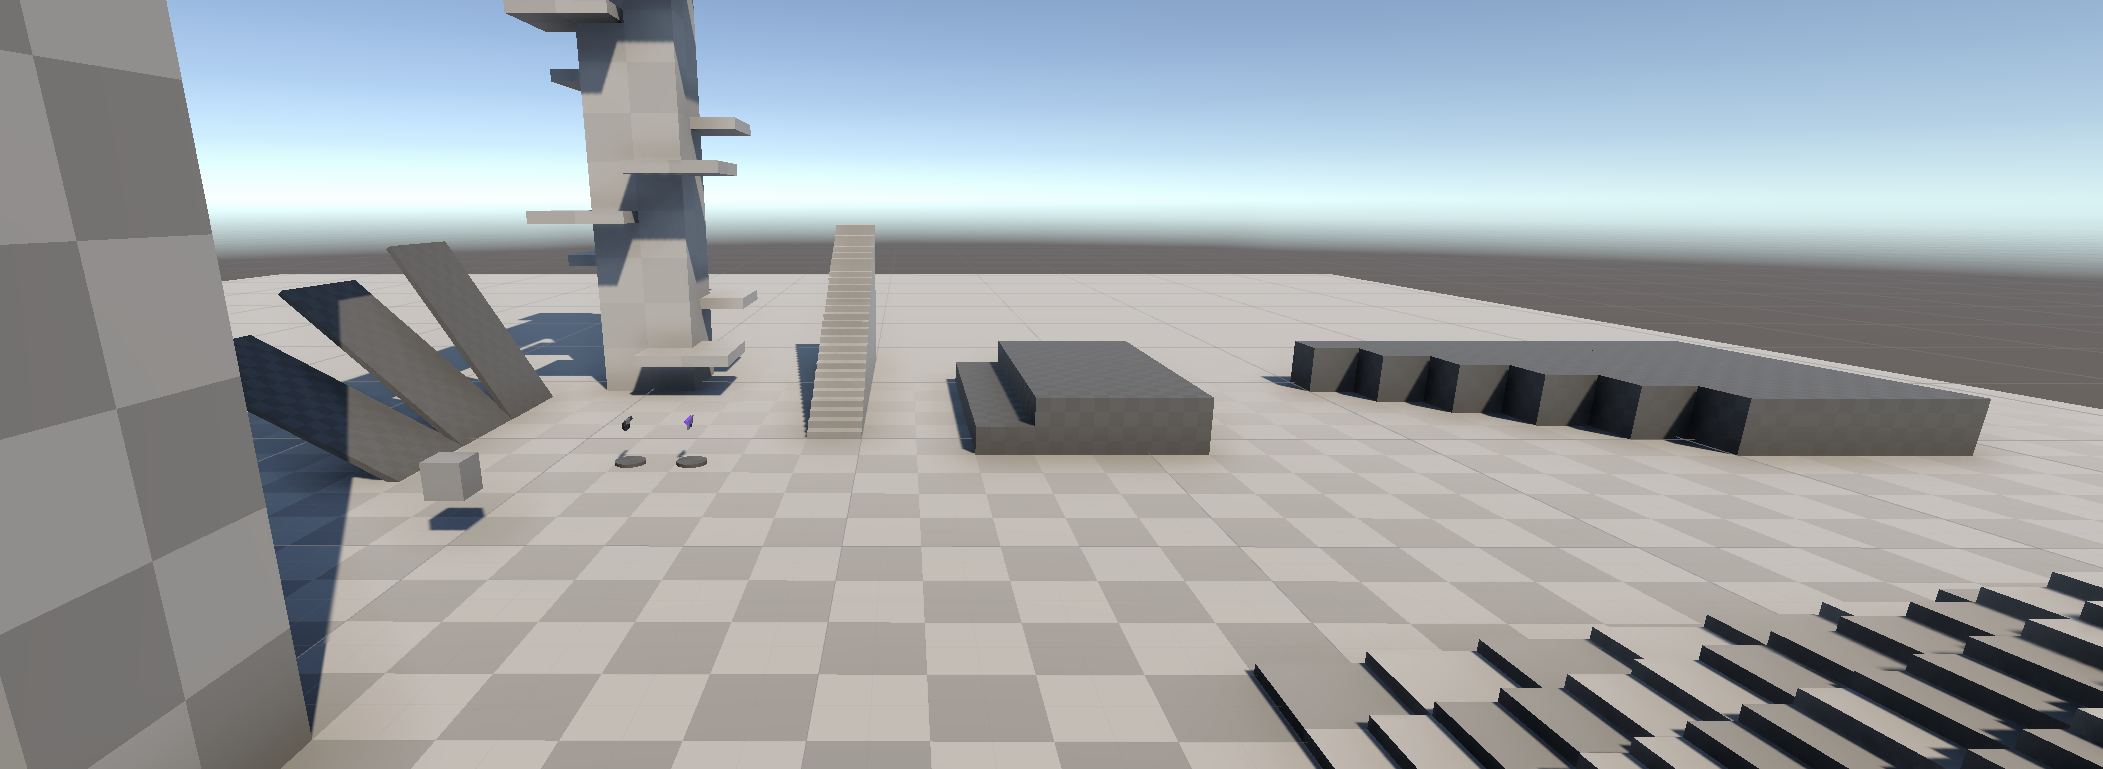
Something we use almost always when starting a new project is whitemesh. We build blocks out of nothing and the very first thing is to get rid of the flat color, and add some kind of sense of scale by applying an uniform pattern on our environment.

Whitemesh block-outs in production often use this kind of shader as a placeholder, in order to simulate the response of a later material, and also keep track of the scale of the world.

In game engines, there are often a default checkerboard texture available, for example the Default-Checker-Gray that is part of Unity’s default resources. Using it can be extremely useful ; however, when blockin out we often scale our objects using non-uniform scaling, thus stretching the checker texture and losing all sense of scale.
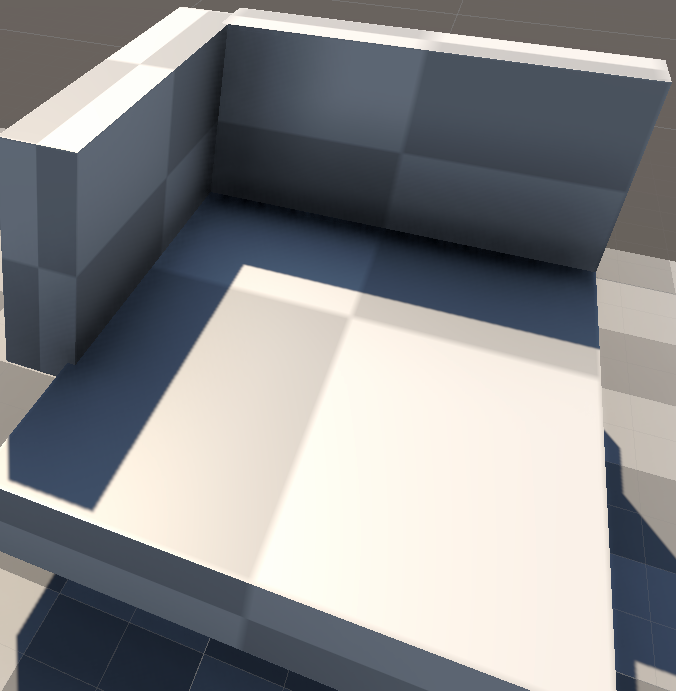
There are many methods to avoid that issue with textures, the most common being triplanar mapping, a quite expensive method that uses 3d world positions of pixels instead of UV Texture Coordinates.

If you are in need of an expensive solution early on your project (for instance if you want to increase the price of one pixel, which can be a good idea if you plan on getting expensive on your project), you could go the triplanar way.

However, there are other solutions that can help you come up with something really fast, without any textures. This article presents one of the use cases, in unity, for URP, but it also works for other render pipelines, and even for Unreal Engine, or any other engine ! As long as you can get pixel positions in world-space, and normal vector in world space as well.

Note : for the purpose of this tutorial, I used a quite simple tool to make SVG figures : Boxy SVG, it is available as a web app / plugin for chrome and opera. And a desktop app on mac and linux. (Don´t know why, firefox and windows are let down)

Principles of the shader

The shader that we are about to make is basically a Procedural 3D Checkerboard that will act as a black and white mask. This mask can be used for instance for material properties blending: One material for the Odd cells (dark), and one for the Even cells (bright).

Our pattern will be revealed on the mesh surface based on a 3D world of voxels of odd, or even material. And it will be revealed as the intersection of it with the Mesh surface.

In layman’s terms, if a given pixel of a mesh is inside a white cell, we display it using the white material properties, otherwise the other.

In 2D that would look like this, the mesh (bright) reveals the invisible, infinite checkerboard grid.
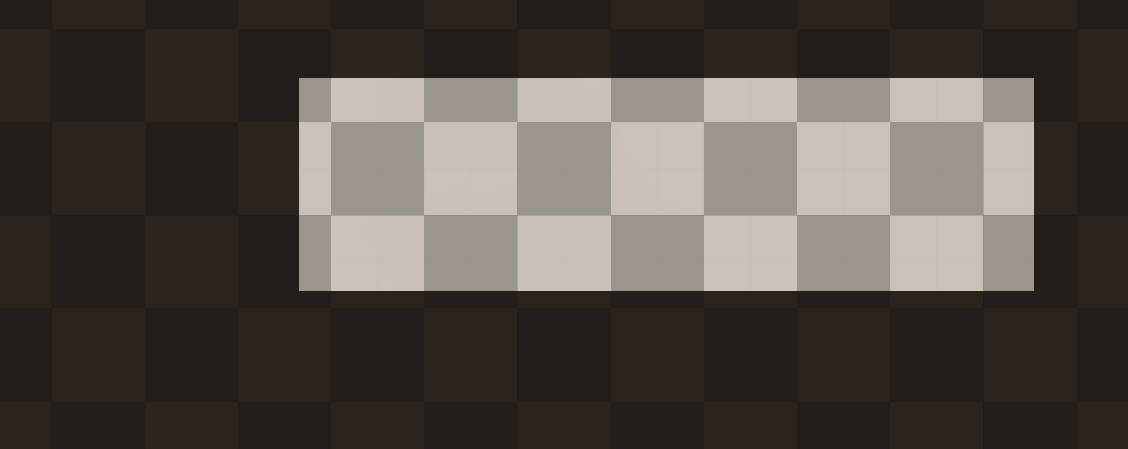
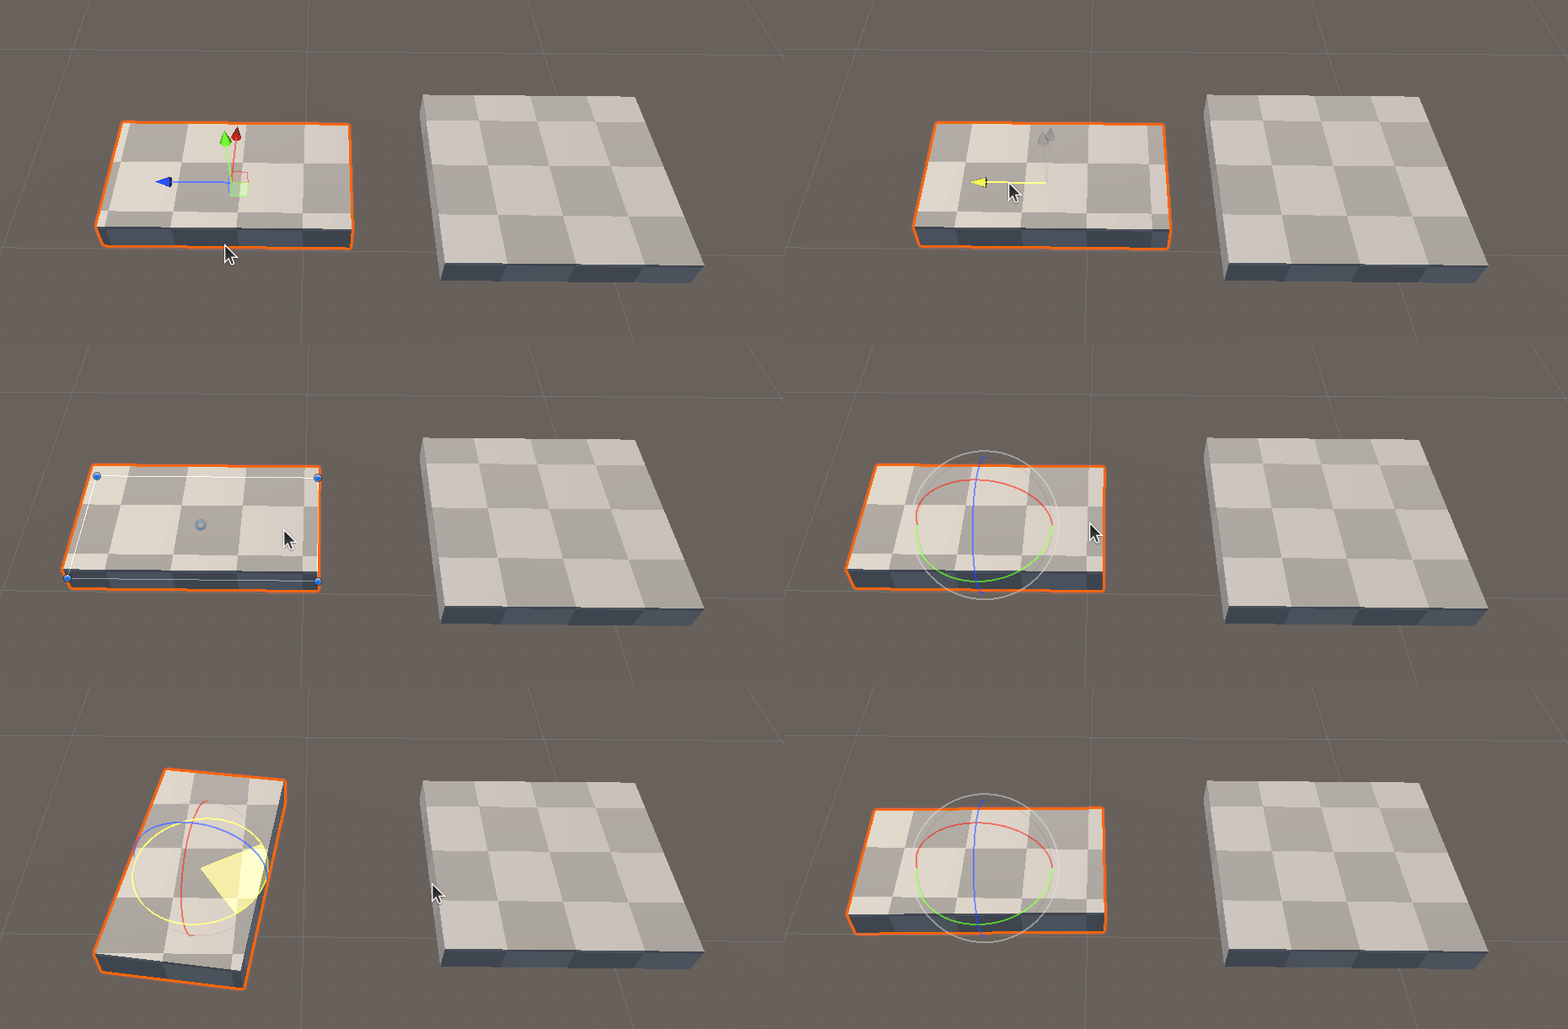
What’s interesting with this conecept is that mesh is independent from the grid. So the checkerboard is always correct in the world, no matter the rotation or scale of your object.
First proof of concept : 1D, then 2D

For starters, we are going to create a blank lit shadergraph, make a material out of it, and apply it to a stretched cube in a scene.
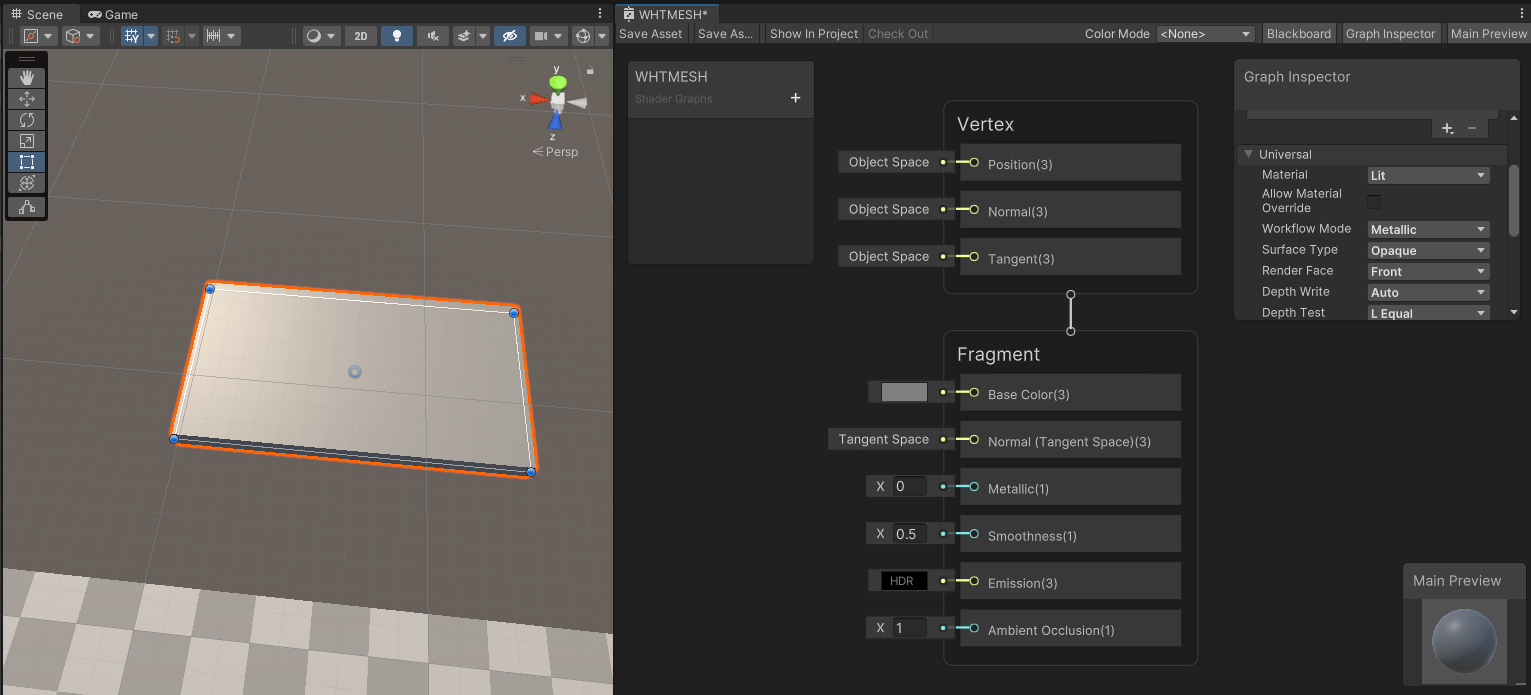
The first thing we are going to do is to reveal the World Positions as UV Color for our mesh. To do so, we are going to use the Position (World) node, and Fraction.

When used in base color, these fucntion will output the positions of the pixels in world space, and the fraction node will only keep the fraction value between 0.0 and 1.0, so you will see a gradient of R, G, and B repeating every 1 unit.

This is great, but now how do we make a checkerboard out of this?

In order to create the checkerboard, we are going to find the math function that alternates odd and even cells, infinitely. This function acts like this:

  • If I am between 0 and 1, I am black

  • If I am between 1 and 2, I am white

  • If I am between 2 and 3, I am black anew

  • …. wait, stop this repeats infinitely, i won´t do that all night.

So if we were to make this infinite function we would say that:

  • If my integer part of my coordinate is even (0 to 0.99999) : BLACK

  • If my integer part of my coordinate is odd (1 to 1.999999) : WHITE

  • Rinse and repeat every 2 units.

Something that is interesting is that we have all that we need already in shaders:

  • Check the integer part can be made using floor or ceil. Floor returns the lower integer (for instance 1 for 1.5), while ceil will return the upper integer (for instance 2 for 1.5). In our case, we will use floor

  • If we were to repeat every two units, we have the modulo operation. This makes the value repeat every N. A modulo of 1 is called fractional part, so it repeats between 0 and 0.999999….. A modulo of two will repeat the range between 0 and 1.9999999.

Knowing that, let’s try this on the X axis of the world position:

And see the results in the world:
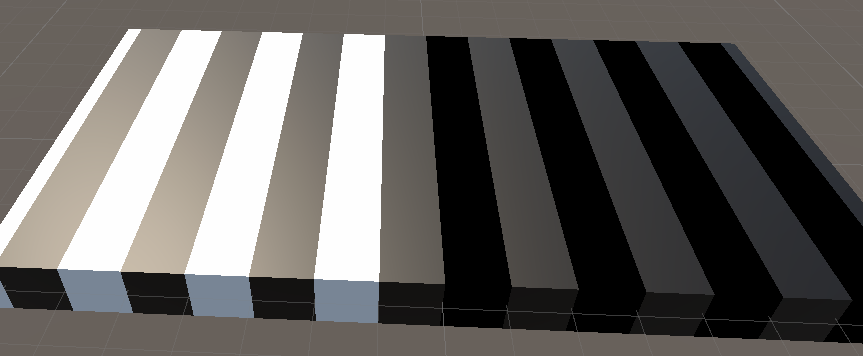
Ok, we have a slight problem here: the right part of the mesh is pitch black. Which reminds me of something : This part is in the negative X coordinate of the world. So if we were to find the lower integer, for example for -0.5, it would be -1, and for -1.5, it would be -2 !

The floor problem, summarized

When we work only with positive values, the floor of x, modulo by 2 works as expected.

However, when dealing with negative values, we get some kind of inversion, which seems quite natural, as the floor will return the lower integer : -1 for the range [-1…-0.0001], -2 for the range [-2 …. -1.00001], etc.

if we take a look at how positive values behave, we get something of interest : even values get black, odd values get white. But it is inverted when negative. Why don´t we remove the sign ?

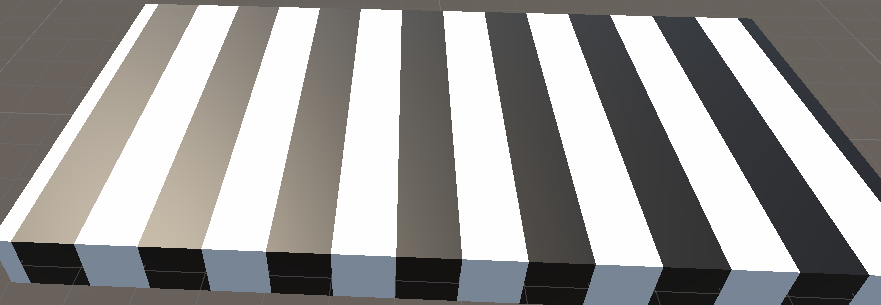
In that case, we get what we expect : inversions. So let’s apply this math back to the shadergraph :

And here we are! Correct inversions for the positive sign.
Extrapolating in 2D, then 3D

So here we are. We get our checkerboard in 1D, now, it is time to make it work on any axis. If we draw again our chekerboard, now in 2D, only with our function based on X coordinates we get this :
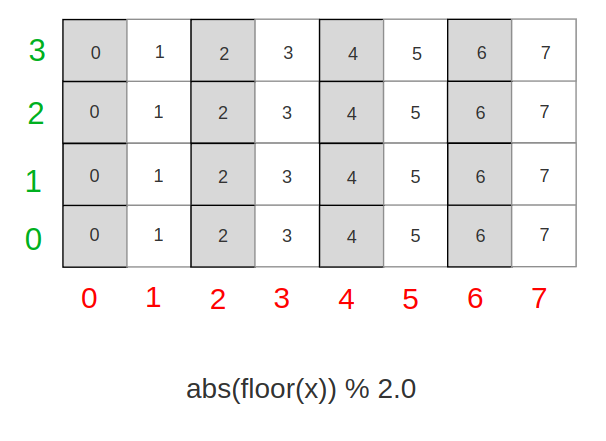
Now, what do we need to alternate values every Y line ? Judging by our parttern, we would probably need to offset every line by 1, meaning every line is offset by the integer part of its coordinate : floor(y)
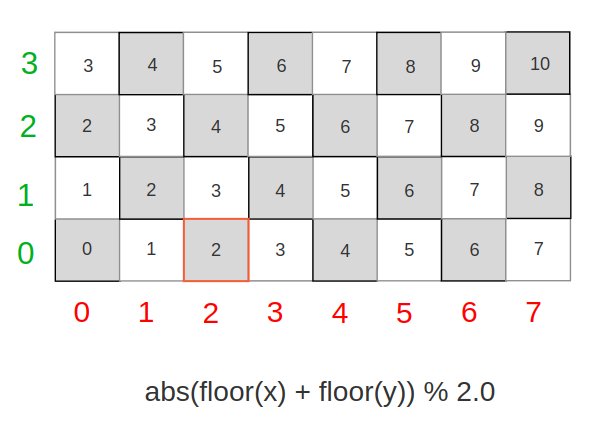
Let’s apply this coordinate change in our shadergraph:
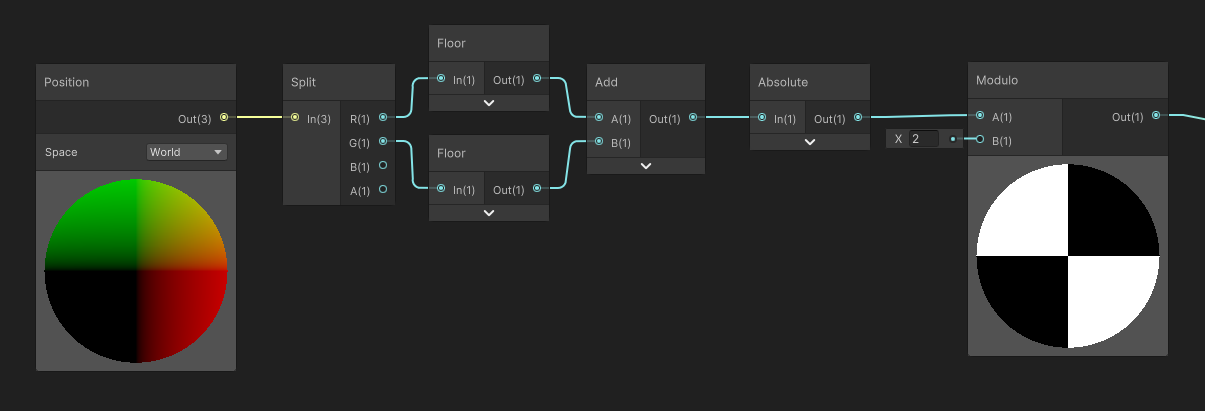
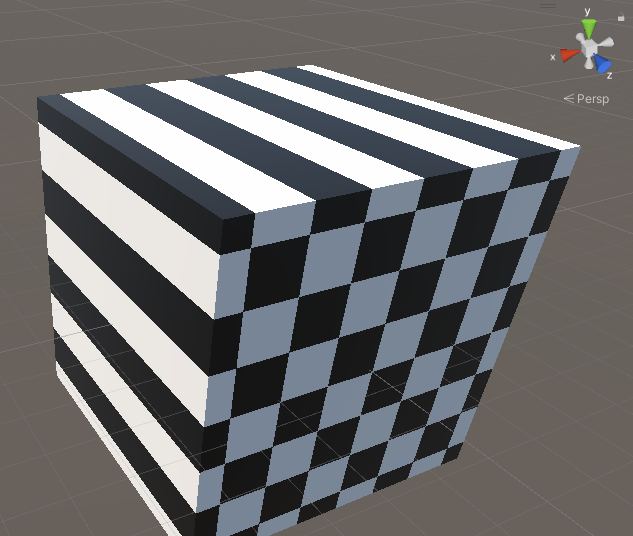
Now it works on both X and Y axes.
Finally, let’s extrapolate again, and add the offset for the Z coordinate.
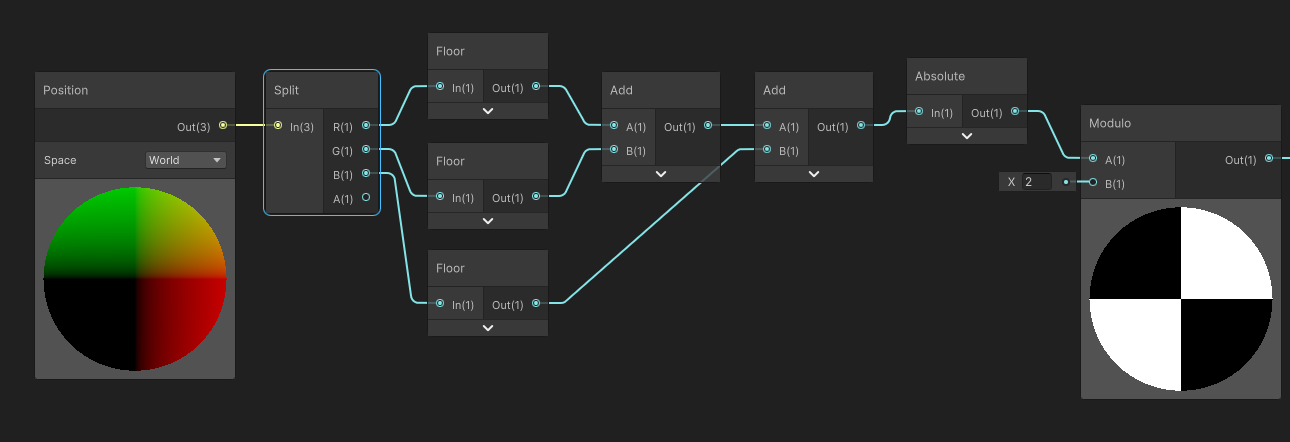
Was not the hardest part, it just works.
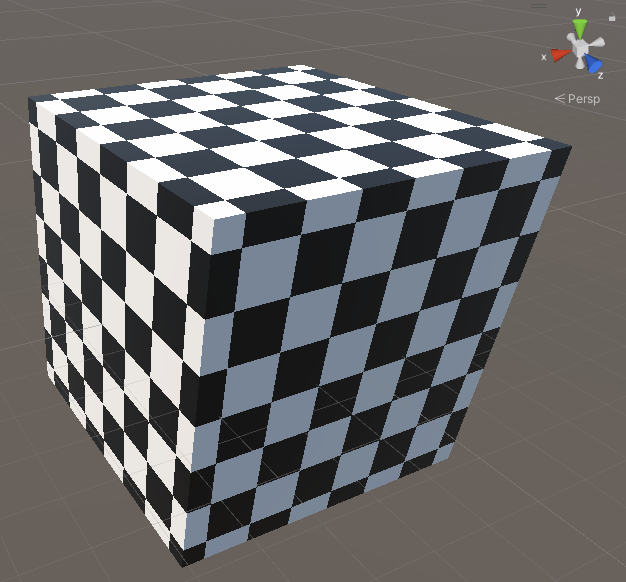
Going Further

Now, we get our 3D Pattern as a function, first, we can simplify the graph to this. Instead of using 3 floor, we can use a floor of the Vector3 position, then add every component. It is absolutely identical.

Floor / Modulo and Interpolation Precision

Now, let’s take a look at our cube, when we put a size of 2 : we get a ton of garbage, and noise, just like Z-fighting. But in our case this is not Z-fighting.
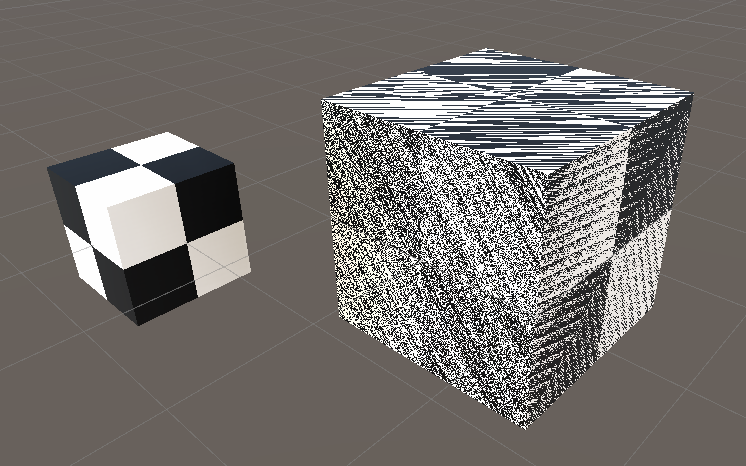
The artifact we see here is due to interpolation of vertex values of the world position. In shadergraph, the generated position is computed in the vertex shader, then interpolated when drawing the triangles. However we´d expect that all the values to be the same right? In our case, the extent of the cube in each axis is from -1 to 1. We are at the exact coordinate where the modulo and/or the floor will change the value.

The reason behind that is some kind of imprecision in GPU rasterizer (the part of GPU that determines, then draws the triangle’s pixels) when interpolating the values between the vertices of a triangle.

While in most cases this issue is not noticeable, here we can observe the imprecision : we are supposed to go from -1 to -1, so we’d expect the value to be exactly the same on all pixels : in practice, all the intermediate pixels values can shift a little, -1.00001 to -0.99999 for example, and that’s just enough to trigger the problem.

So, how do we fix the problem?

Short answer, we can´t. However, we can try to reduce the problem in common cases. The problem did happen when we were using integer values as scale, and/or positions. That is a common case while blocking out levels, and even meshes we author follow very often integer coordinates.

Also, if the problem did happen at any arbitrary other value threshold, it would be really diffucult for a user to manually place/scale the object so the problem appear intentionally.

A solution I found in order to fix the issue is to apply a slight offset to the world position we read, so it doesn´t overlap the integer anymore. We don´t change the geometry, only the values we read for the world position in our checkerboard function.

In order to do that, we can assume that the mesh is slightly smaller than it actually is. And to compute the shrunk-down position, we will apply an offset based on the normal of the mesh.
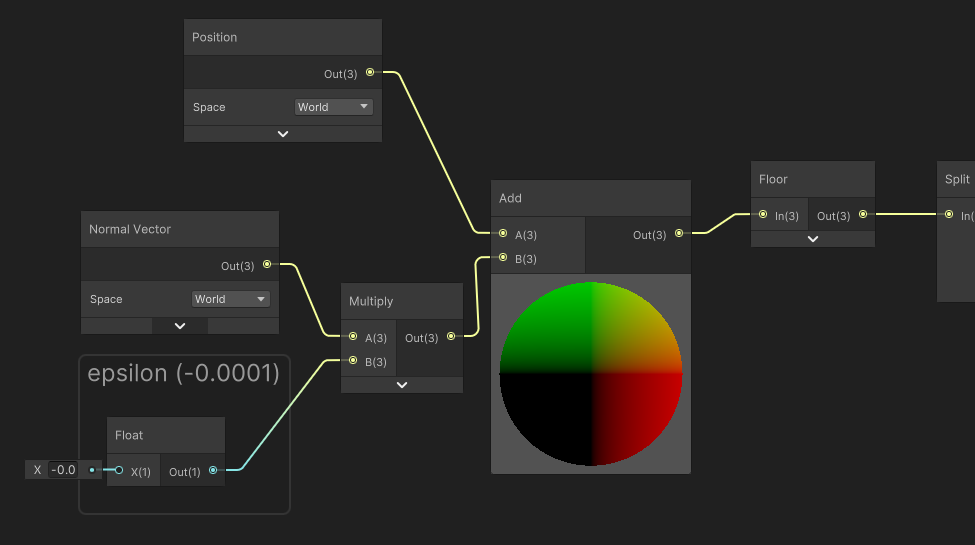
In the shadergraph, I multiplied the Normal vector by an arbitrary epsilon value that needs to be small , but big enough to alter the problem.
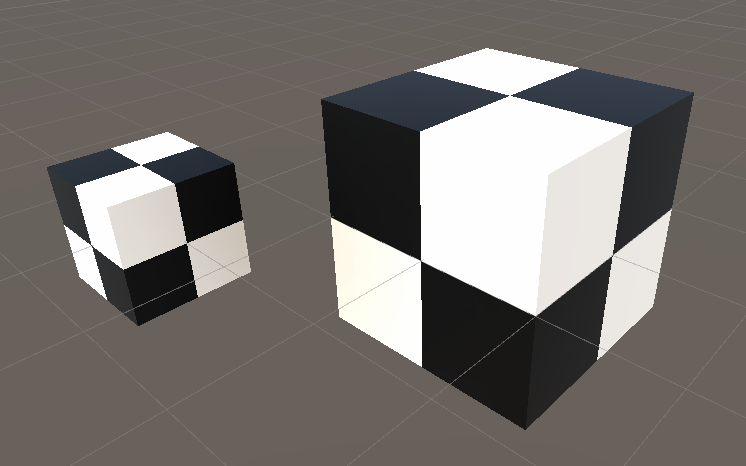
So, here we would have the interpolation error slightly offset : now the error happens between -0.99985 and -0.99995, we do not cross the integer value anymore, so the problem is solved for our case.

Local Space Checkerboard

Sometimes, we also want moving objects keep their checkerboard while moving around. However in our case, we used world position/normals to compute the mask.

If we change the coordinates to object space, it seems to work at first sight,
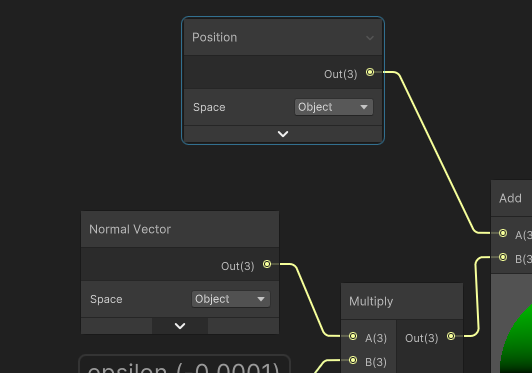
However when we scale our object, the checkerboard doesn´t follow the scale anymore.
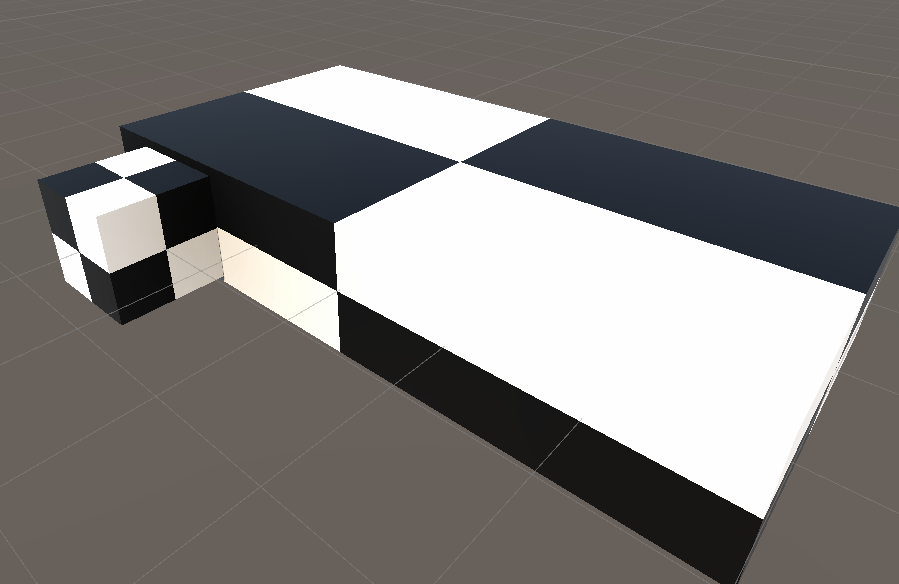
The problem here is that we read the values of the object before it is being scaled by the transform matrix. While it can be intended, it is not really interesting to read the metrics.

The solution is to apply the object scale to the object position coordinates.
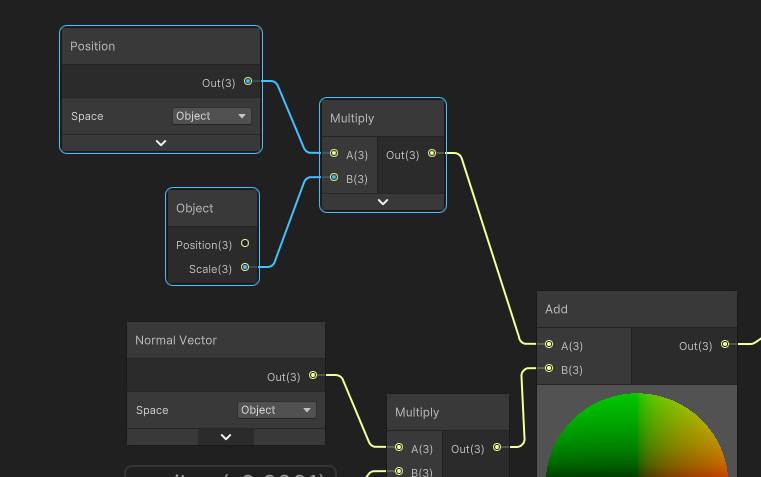
Now it behaves correctly
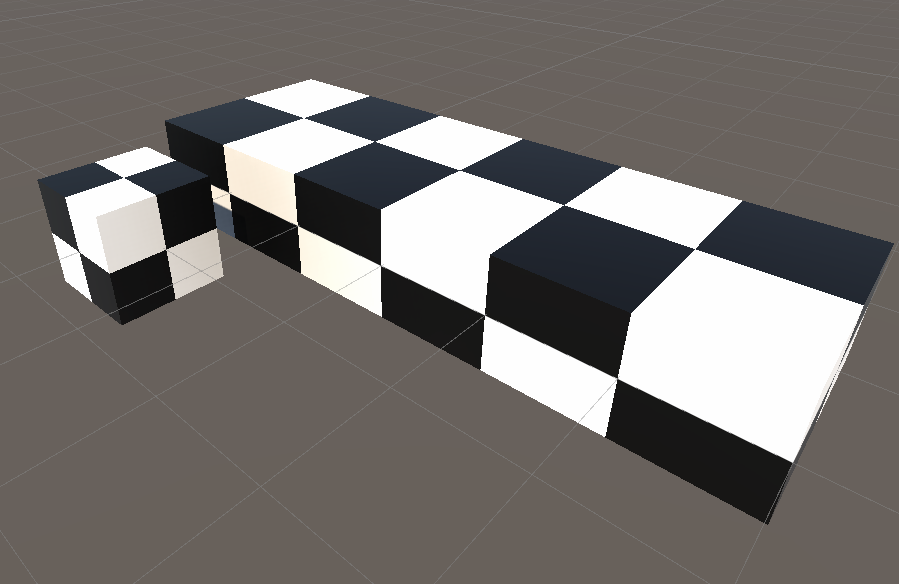
Wrapping up

We can see in this example a quite simple function that you can use for your materials, that doesn´t require any textures and that you can extend to your liking. Of course, you can also use a scale to the input position to control the tiling of the checkerboard.

Something I also used in my shader is to fade out the checkerboard pattern in distance to avoid too much aliasing. It can be read from the Screen position (Raw) node, in the alpha channel.

Unity is one of the most popular game engines worldwide and it is supported across a wide variety of platforms. Its editor is widely used by Windows and macOS users, but it is also compatible with linux.

I’ve already covered how to install it easily on linux, both Ubuntu and Manjaro. However, changes in 2022 have made the process really different, and even more tedious than before. So, here is a guide that presents all the changes, caveats and how to handle them.

Spoiler Alert I’m a bit sorry in advance about the tone of this blogpost, but the adventure did sound a bit like a joke to me. Unity support for linux came to a point where it was easy-ish to install. Now, it’s become a mess.

There has been a lot of changes regarding Unity engine on linux. IMO not all for the best, but now we have to cope with these:

Unity Hub

it was previously distributed as an AppImage which felt pretty convenient for me as It is not the kind of application that need day-one update and security patches. I usually updated it when I had time. And despite the poor support of AppImage integration in shells (wink-wink-GNOME), having to add manually the execution flag and replacing a file was … not that tedious.

Now, somehow, the 3.0 and onward versions are distributed via your Distribution Package manager, but not all. Ubuntu and CentOS are officially distributed (RedHat also but it’s only stated in the Help Page)

Something weird about linux version support is it only officially supports old versions in its requirements:

  • Ubuntu 16.04 : Already End of Life with paid support. I think this was not updated, because it is not present on the Help Page anymore

  • Ubuntu 18.04 : Nearing End of Life

  • Ubuntu 20.04 : Not on the Requirements page, but supported

  • Ubuntu 22.04 : Out for more than 6 months, but not officilally supported (caveats, see below)

  • CentOS 7

  • RHEL

Anyway, that means that the Hub (which is required to run unity, because it handles the licenses), is only available through 2 distribution systems:

  • APT for Ubuntu and debian-based systems

  • RPM for CentOS/RedHat

For this guide, I’ve only tested APT so I’ll cover only my findings, caveats and workarounds. Basically the Install Guide makes you do 3 things

1 - Add a source repo to your apt sources.list file.

$ sudo sh -c 'echo "deb https://hub.unity3d.com/linux/repos/deb stable main" > /etc/apt/sources.list.d/unityhub.list'

2 - Add its public signing key

$ wget -qO - https://hub.unity3d.com/linux/keys/public | sudo apt-key add -

3 - Finally, apt update and install the hub

$ sudo apt update
$ sudo apt-get install unityhub

As a personal side note, I’m not that confident with distribution system through apt modifying my sources.list as I’ve often experienced breaking things through release upgrade. I’ll cross fingers so my system can upgrade without trouble next time.

When I try to run the hub I run into a first problem, nothing happens. :(

After a bit of debug, and search, I stumbled upon the forum post where many info can be found. We learn there that we require libssl1.1 (an old one) which… is no more present on Ubuntu 22.04. It now uses libssl3 and made libssl1.1 obsolete.

And then we are presented with the ugliest workaround around : Let’s reference a repo from the past. Not a LTS one though, so fingers crossed the hub will move on to libssl3

echo "deb http://security.ubuntu.com/ubuntu impish-security main" | sudo tee /etc/apt/sources.list.d/impish-security.list
sudo apt-get update
sudo apt-get install libssl1.1

We now have two new sources in our sources.list…. wait no…. impish-security doesn´t have libssl1.1 anymore !

Let’s use our delorean again…. and reference even older repositories!

echo "deb http://security.ubuntu.com/ubuntu focal-security main" | sudo tee /etc/apt/sources.list.d/focal-security.list

Now we are fetching libssl 1.1 from focal (the former LTS) repositories. What could go wrong?

Anyway let’s install it.

sudo apt-get update
sudo apt-get install libssl1.1

And now it runs! What a ride! I remember having issues about GPU Sandboxing, but it was with the AppImage version, it seems that it is now part of the startup

cat /usr/bin/unityhub seem to append the argument.

Now we can start the editor, and move on to setting up a propert IDE

Visual Studio Code… wait no : Rider

Sadly, VSCode support is now dropped, and the discussion got many people upset, so let’s move away to something paid : Rider.

Rider is a paid IDE, and it is good. Luckily, if you are into open source, they offer you a license for your project(s). If not, you are now in a world where you have to pay 19$ a month to have proper support on linux.

Side note : The VSCode Extension is still a MIT open source project, alongside the package. So it means that the community could re-appropriate it to extend its life.

Rider is quite easy to install, and do not depend on any distribution system.

You download a tgz, unpack it, run the installer, and you are done!…. Almost.

Once in your unity project, you need to reference rider as the first-class-citizen IDE in Edit > Preferences > External Tools (if not visible, you will probably need to add the Rider Package in Window / Package Manager).

Once all this set up we can open the project in Rider and….

MSBuild not found

Damn! It is neverending, let’s install it: Install .NET on Ubuntu - .NET - Microsoft Learn

And now we got rid of the error. Finally! By running Rider again, we can now attach our debugger… and to be honest. This was the easiest part, because it just works!

To conclude, I would say that the change of distribution, and IDE made many things a hell, and some things easier (especially IDE configuration), ao it is still a mixed feeling. My major rant, is that information is scattered in many places, and it’s becoming a mess to assess and make things right so you can work.

There are still three big issues I see for development:

  • Deprecation of VSCode jails people wanting to use free tools out of linux. Which is quite ironic TBH

  • Moving towards a distribution system that doesn´t ship your required libraries anymore is also ironic. There are many distribution systems that can handle this properly (docker, flatpak)

  • Forcing the users to add older distributions security repositories is WRONG. This is a BAD PRACTICE and should NOT be enforced by a company that sells software.

I really hope that the workflow will get better in the coming months, and especially moving away from libssl1.0

I also wish that the community will take back the support of VSCode, as the workflow was a bit tedious to set up but it ended being reilable enough on linux.

In the previous article, we saw how to to set up unity on linux, and especially on ubuntu-based systems, using apt and snap as package installation sources. However in Arch-based distributions such as Manjaro, there is no such thing as apt, or snap (even though you can install snaps, but it is not out of the box)

This article is not as in-depth as the main concepts are already covered by the previous article.

Install Steps

So, we are now in manjaro, and the first thing we can see looking at unity´s linux forum main thread, there is no official support for linux besides ubuntu and CentOS. Trying to get the unity hub seem to work, but executing it results in it somehow crashing at startup.

Is it over? Not yet! There seem to be people having tried to tackle this already, and down the thread we happen to discover that people from arch’s community have created a package in the AUR (arch user repository) that seem to work. And even more good news: it seems that is actively maintained.

So, let’s go to pamac (namely the add/remove software app), and let’s check the following in its preferences.

  • in third party tab, Enable AUR Support (if not already), and enable check for updates

Now, we can close the preferences, and start searching. The package we are loking for is named unityhub in the AUR. so let’s install it.

While weŕe at it, we will need to install VS Code, its package is named visual-studio-code-bin (still from AUR source), mono from official repositories (extra), and dotnet-sdk from official repositories (community)

Now we should be good to go, we can start unity hub for the first setup (I did not have issues after login, as firefox did require to open an unityhub:/ URL)

Installing Unity seem to work. Please verify however that you have sufficient hardware requirements, and if you are using a NVidia GPU, that you are using the closed-source drivers (and not the nouveau driver).

The setup of VS Code is mostly the same as other linux distros, please double check that you enforce using the global mono for omnisharp in the preferences. (Go to preferences and search for mono global)

Final Words, Takeaways

In the end, it seemed even more straightforward, I am not sure that the dotnet-sdkpackage is required but I installed it anyway. However as said in the unity forums, Manjaro is not officially supported so I guess it’s a leap to take, and see if it´s worth giving it a try.

Unity is one of the most popular game engines worldwide and it is supported across a wide variety of platforms. Its editor is widely used by Windows and macOS users, but it is also compatible with linux.

However, setting up a working dev environment on linux is not as easy as it sounds : This article presents a step-by-step comprehensive guide with emphasis on some common pitfalls in order to succeed on setting up the environment.

Goals and Scope of this Guide

images

The goals of this guide are to install both Unity and Visual Studio Code on a pretty popular Linux distribution : Ubuntu. For the purpose of this guide, we will use Ubuntu 21.10 (Impish) 64-bit for PC (amd64).

The goals of the guide are:

  • Install Unity Editor for Linux (current 2020.3 LTS)

  • Install Visual Studio Code and libraries for Unity Development

  • Create a Unity Project

  • Setting up Visual Studio as IDE for your project

    • Ensure Intellisense is working

    • Ensure breakpoints and debugging are working

Note : This guide assumes you are already familiar with basic Linux concepts and are confident with command-line. Also, as it is not an introduction to unity, some of its concepts

Installing Unity Editor

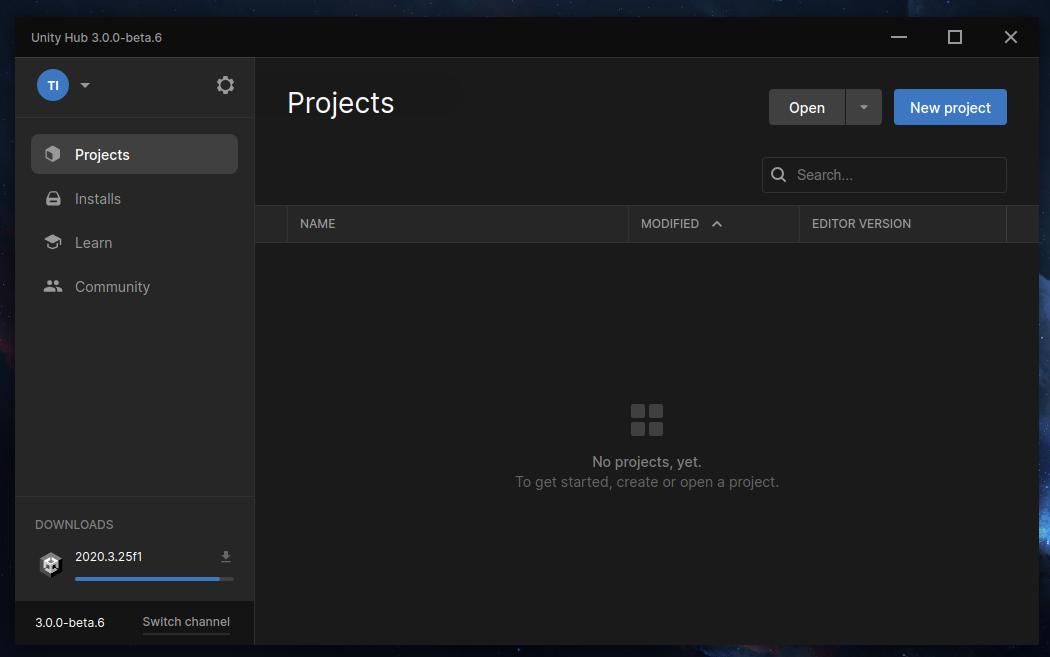
Unity Editors are quite easy to install. In order to manage installations and projects : a launcher application named Unity Hub centralizes all into one AppImage.

You can download it for Linux from this webpage : Get Started with Unity - Download the Unity Hub and Install the Editor

Once downloaded, the UnityHubBeta.tar.gz can be extracted either from your files (Right Click > Extract Here) or using this command line in your download folder:

tar zxf UnityHubBeta.tar.gz

In this folder, we have two files of interest: INSTALL.sh and UNINSTALL.sh. These two files will be used to install or uninstall the Unity Hub

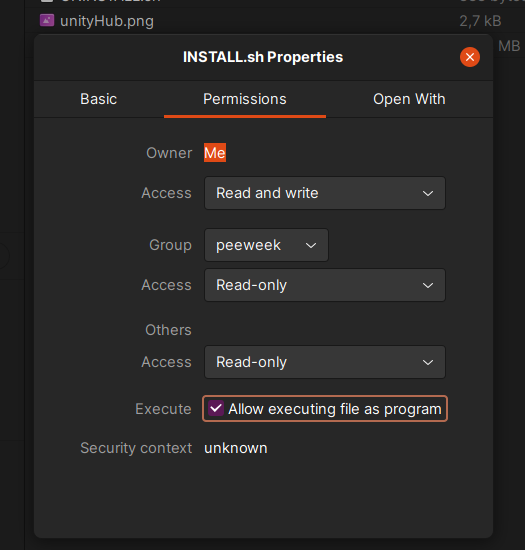
In order to install, we will need first to run the INSTALL shell script. But we need first to make it executable. We can either Right Click > Properties > Permissions and enable the Allow Executing file as Program. Or use the following command in a terminal:

chmod +x ./INSTALL.sh

Once enabled, you can run the installer using the following command:

peeweek@XXXX:~/Downloads/UnityHubBeta/Unity Hub$ ./INSTALL.sh 
This script will only run if the UnityHub.AppImage is at the same location as this script
This will wipe any existing Unity Hub installations, are you willing to proceed? [N|y]: y
Integrating Unity Hub into system
Updating AppImage permissions
Moving AppImage to the Applications folder
Adding the necessary .desktop file
Adding the unity hub icon
Registering the required unityhub URL scheme with XDG
Installation complete.

Once completed, only 3 files shall remain in your install folder:

  • INSTALL.sh

  • README

  • UNINSTALL.sh

Please keep them in a safe place you want to uninstall/reinstall later.

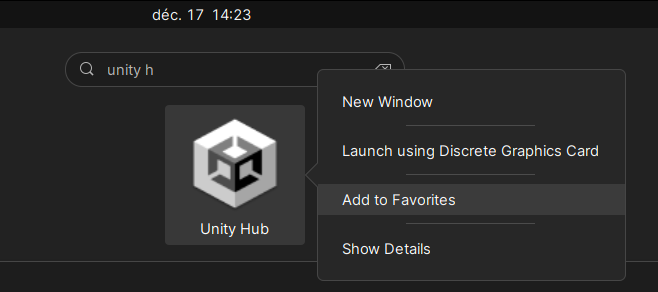
Now, unity Hub is installed, and can be accessed from your applications, and add it as a favorite in your launcher bar.

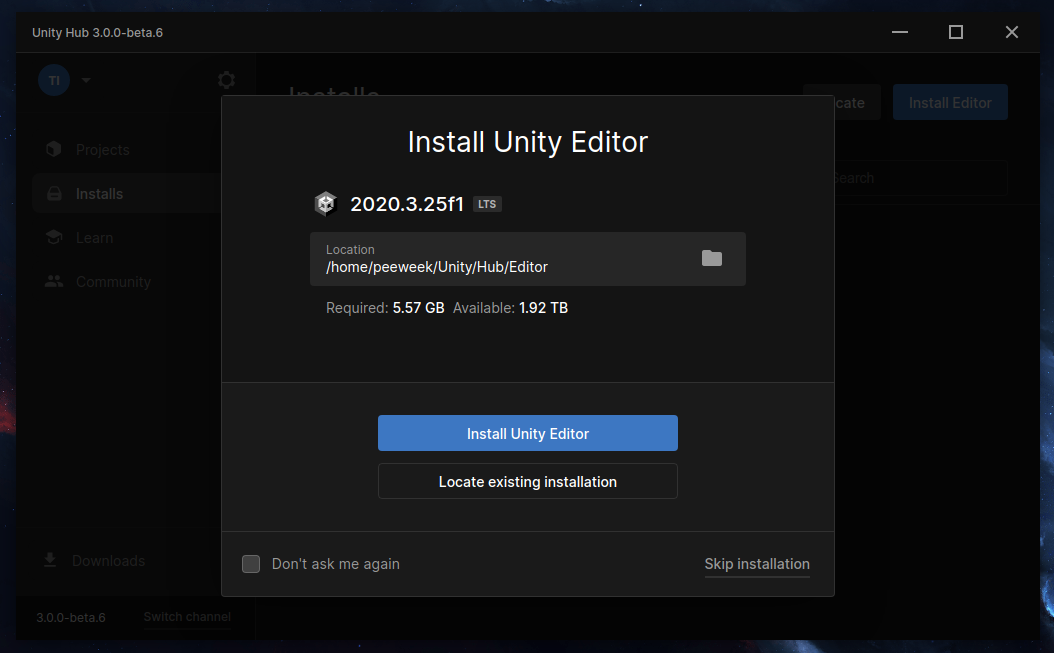
After Starting the Application, you will be promtped to create an account, choose from a paid license (if you have a pro license), or create a personal license (for revenues under $100’000). Then you will be able to download and install your first editor. The suggested version is always a good choice.

Once it has started installing, you can minimize the unity hub window. We will move on to the Visual Studio Install and set up.

Installing Visual Studio Code

The next part involves installing Visual Studio Code, an IDE from Microsoft that enables editing C# scripts from unity, but most importantly, attach to running instances and debug code.

In order to set that up correctly we need:

  • Visual Studio Code IDE

  • Mono runtime library (we will use mono-complete)

  • The Microsoft DotNET SDK

Visual Studio Code

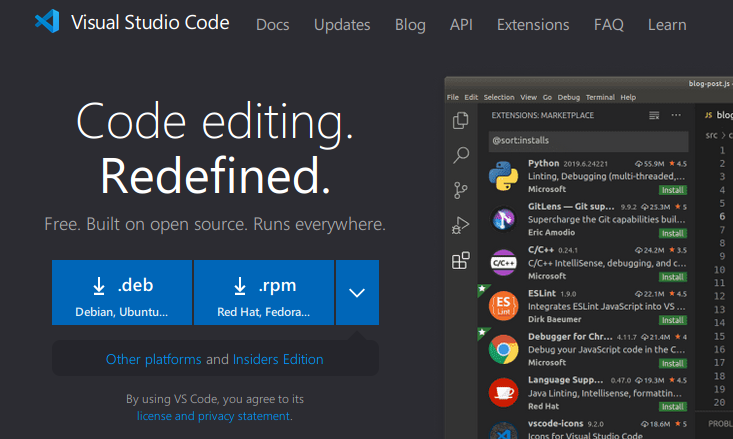
In order to install VS Code, I’ve chosen to use the manual install from microsoft website. As we are on Ubuntu, we need a .deb install package that can be acquired from this webpage: https://code.visualstudio.com/

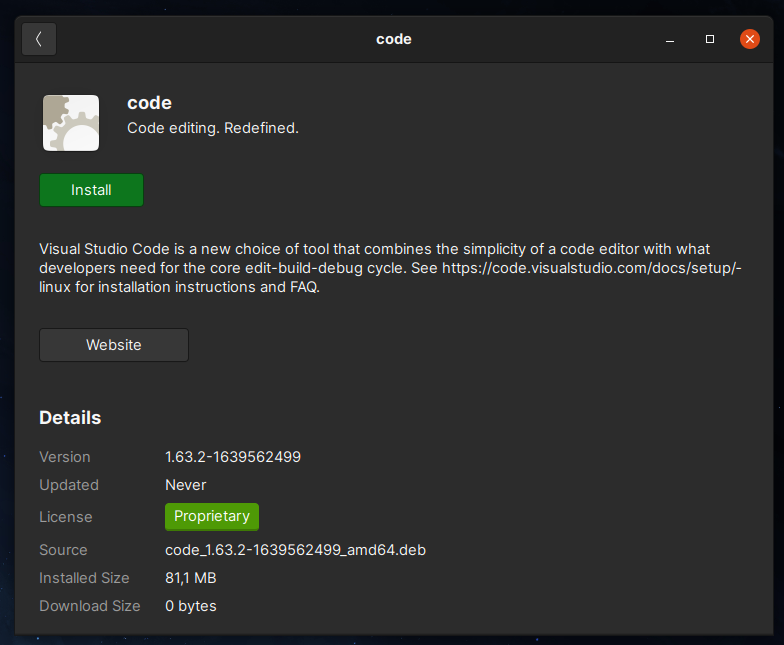
Let’s download and save the deb file in our Downloads folder. Then right click the deb file and select Open With Software Install.

Then click the green install button.
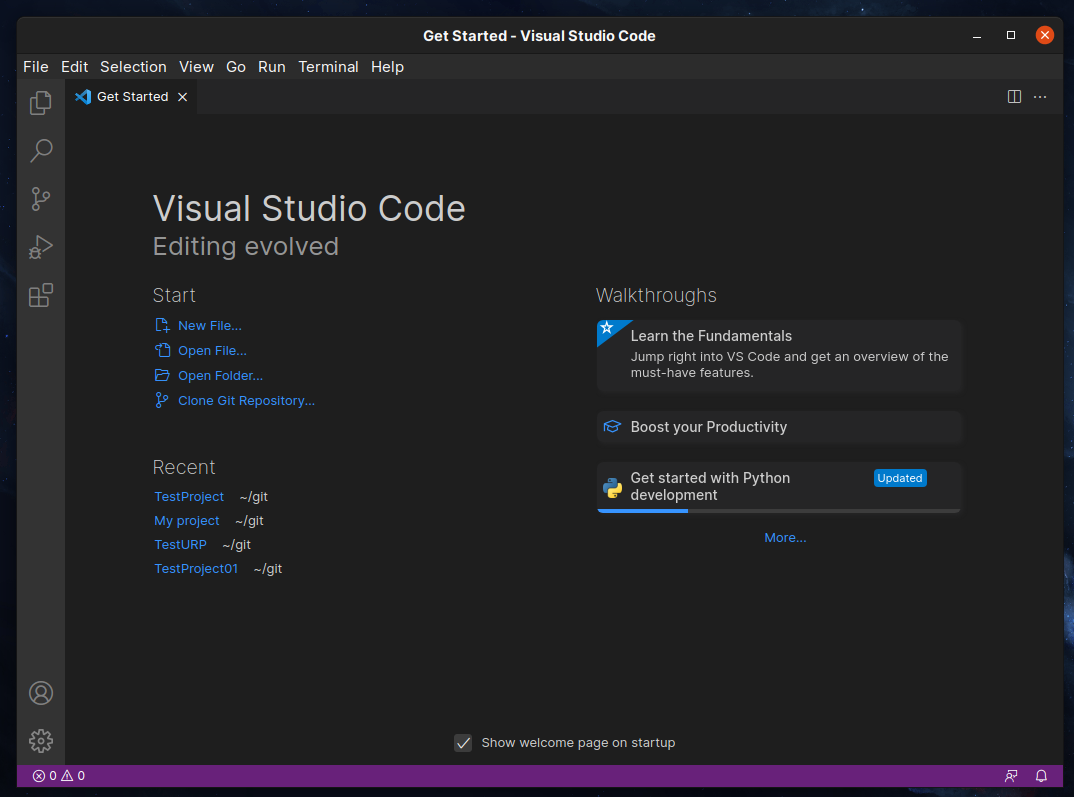
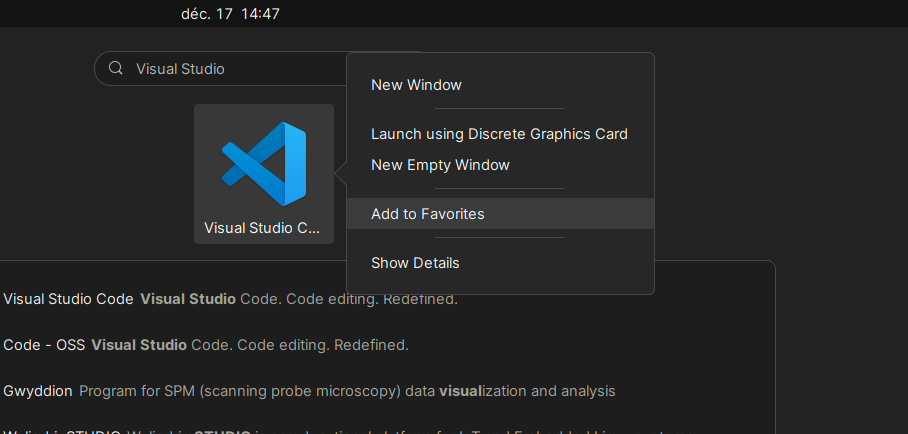
After installing, you can launch Visual Studio Code in your activities, and optionally add it to your favorites.

Mono and Dotnet-SDK

Before running Visual Studio Code, we will install additional libraries, first we will need to ensure we are up to date : let’s run the software updater, or run the following commands:

sudo apt-get update
sudo apt-get upgrade

Then, in a terminal, we can first install mono:

sudo apt-get install mono-complete

This package installs many packages and it can take a while. After installing you will be back to the shell and now you will be able to verify the mono installation

$ mono --version
Mono JIT compiler version 6.8.0.105 (Debian 6.8.0.105+dfsg-3.2 Wed Jun 30 05:34:49 UTC 2021)
Copyright (C) 2002-2014 Novell, Inc, Xamarin Inc and Contributors. www.mono-project.com
	TLS:           __thread
	SIGSEGV:       altstack

.....

Then, let’s hop onto DotNET SDK. This package is not hosted on the ubuntu APT repositories, but it can be found on the snap store. In order to install it please run

$ sudo snap install dotnet-sdk --classic
dotnet-sdk 6.0.101 from Microsoft .NET Core (dotnetcore✓) installed

Configure Visual Studio Code

Now we have completed the install part, let’s open Visual Studio Code. On the left toolbar, let’s click the 5th icon from the top : Extensions

In the Extensions, please use the search to install the following extensions:

  • C# (Microsoft)

  • Debugger for Unity (Unity Technologies)

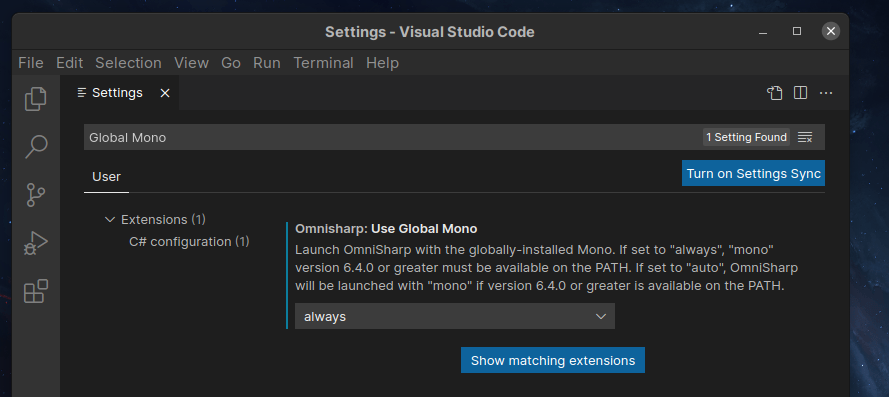
Once installed, please go into File > Preferences, and search for “Global Mono”. Ensure the “Omnisharp : Use Global Mono” setting is set to always.

And we should be good to go! Now we can close Visual Studio and go back to Unity Hub.

Creating the Unity Project

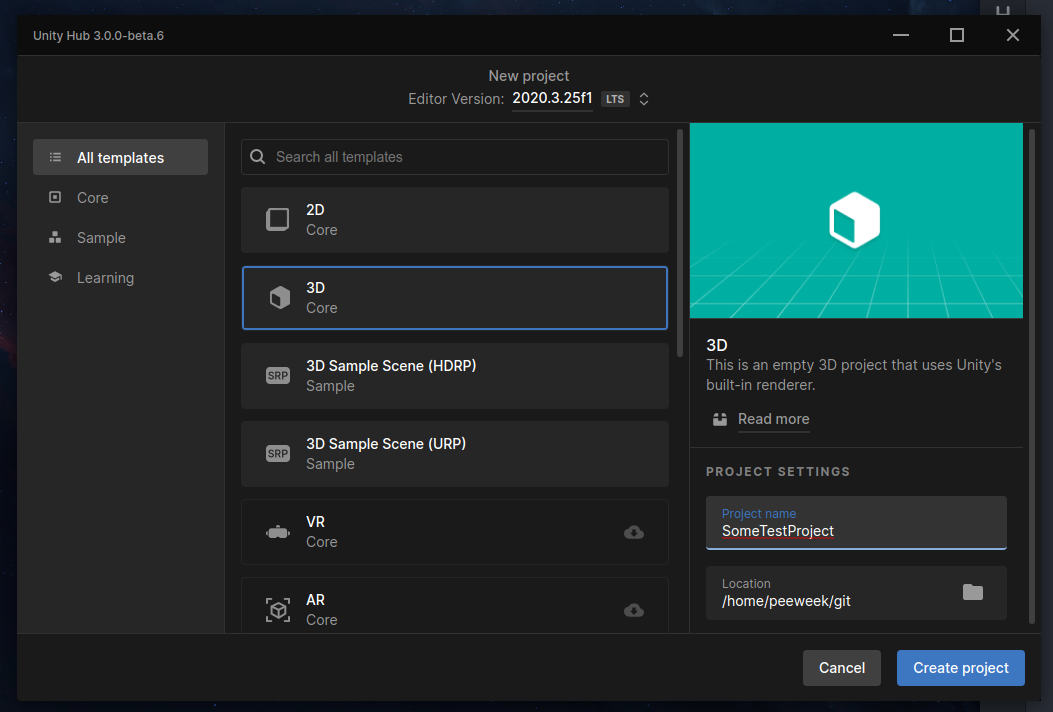
Back into Unity Hub, letś click the Projects button on the left toolbar. Then Click the New Project Button.

Now, we will create a new project for unity. There are many templates that can be used as a startup project, but for our example we will use the 3D Template. Let’s choose a name and folder for our project, then click Create Project blue button to continue.

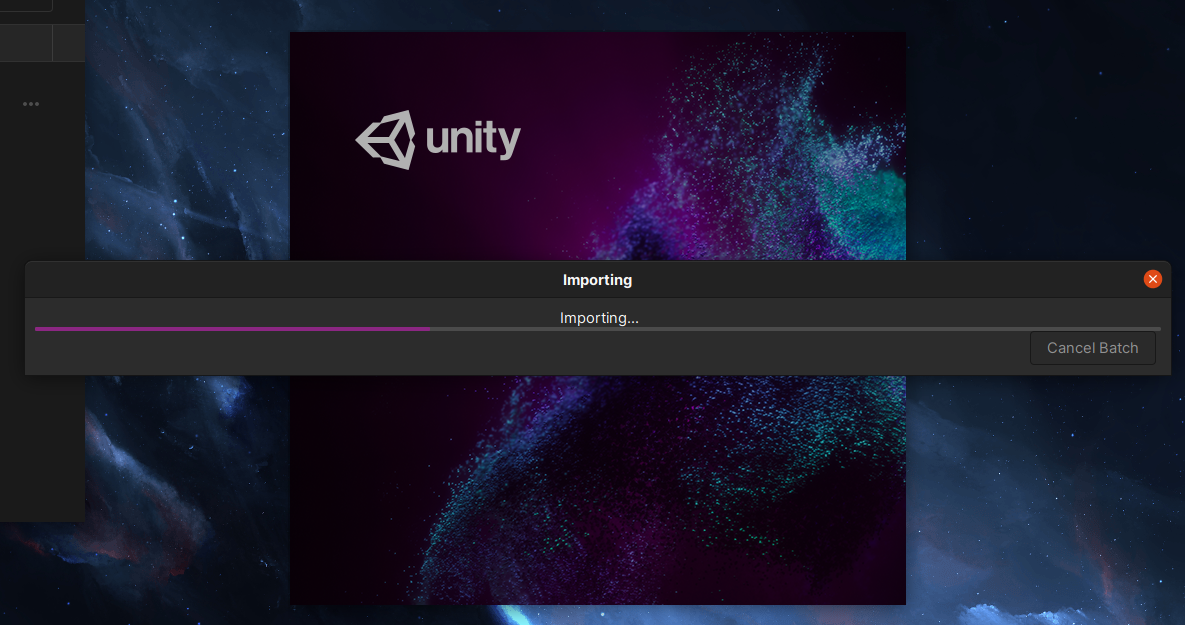
The project will then start loading, and importing. This takes a while for the first run.

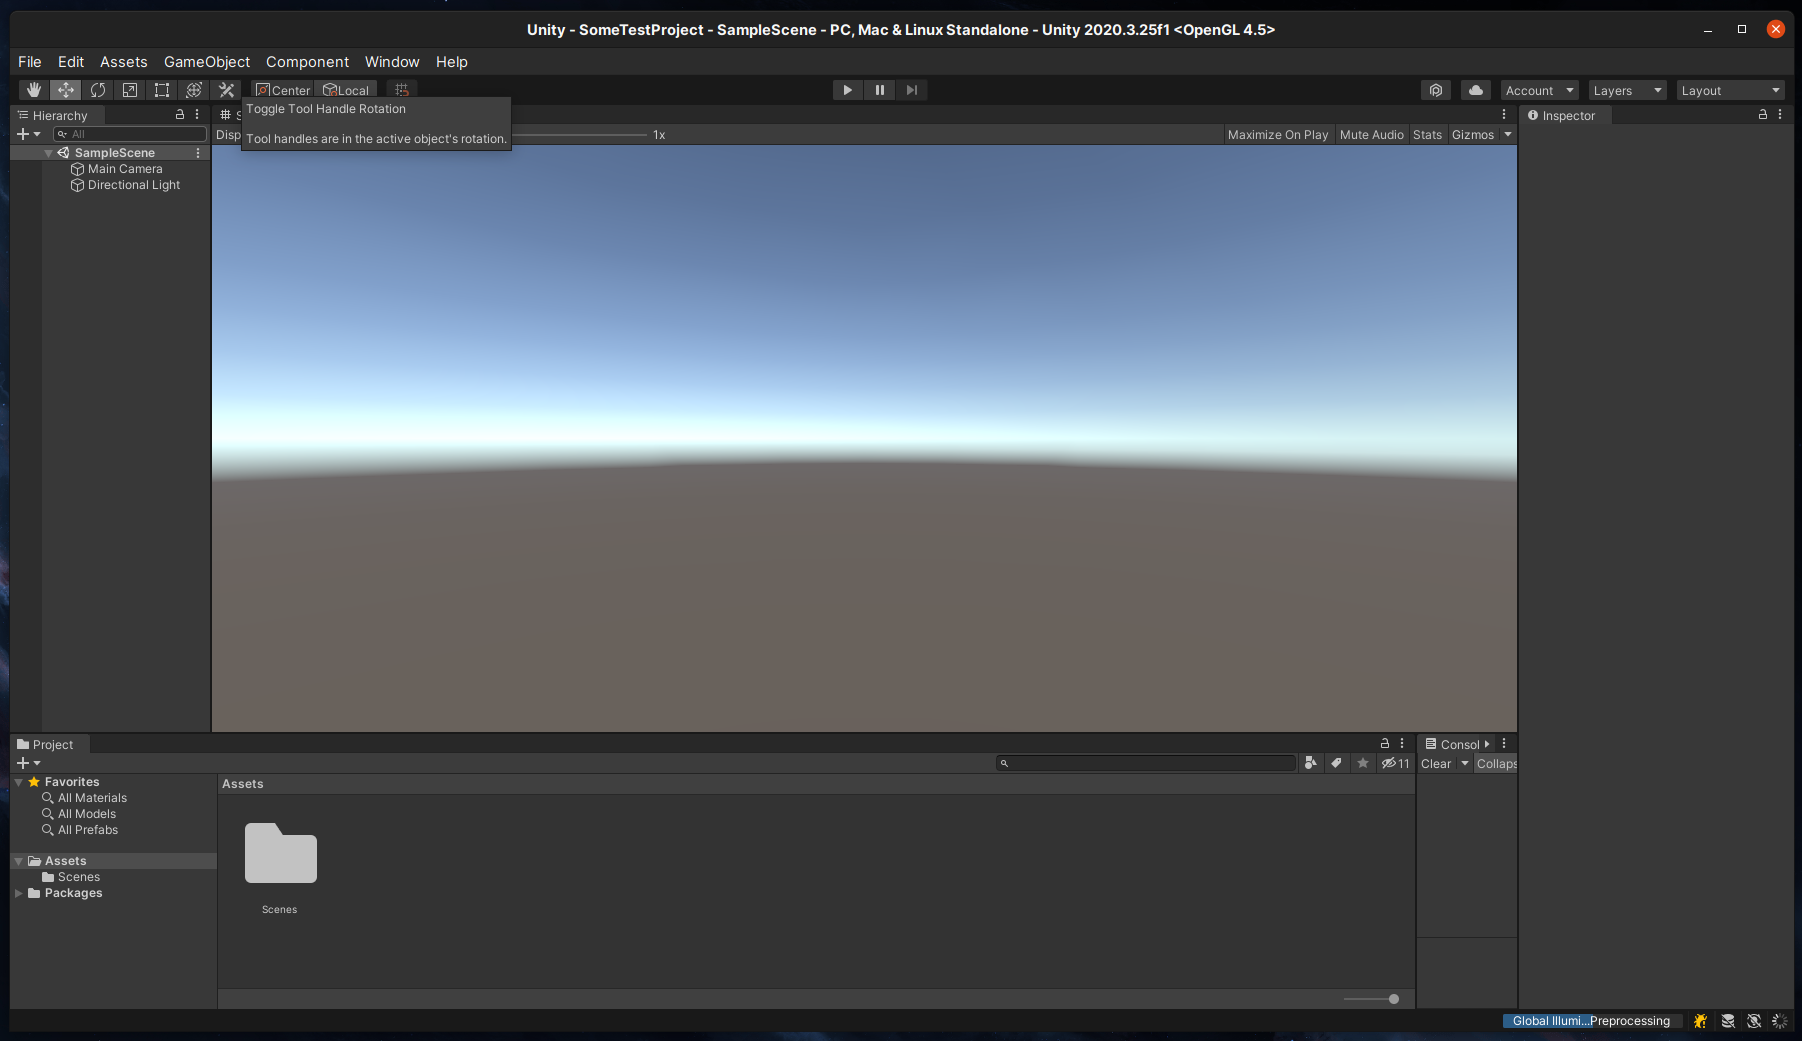
After a while, the editor will open, and we will be now able to do some scripting.

Setting up Scripting

Now that we are in unity, we will first check that VS Code is correctly detected. Let’s open our preferences (Edit > Preferences), then navigate to the External Tools section.

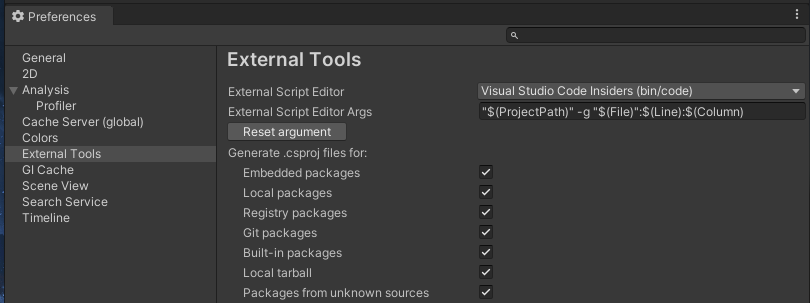
If Visual Studio code is detected, it should be available in the drop down for “External Script Editor” (Strangely it is referred to as VS Code Insiders for me). If is ok, you can check that the argument is correct (and optionally reset it using the button.). A good thing is also to enable the generation of the .csproj files.

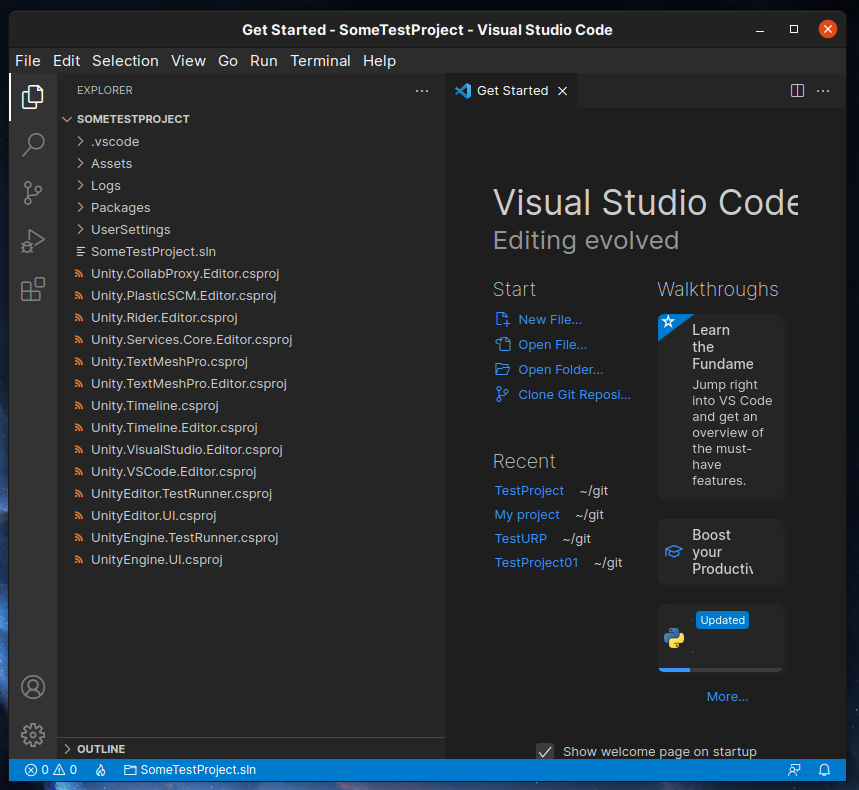
Once everything seems good, we can try opening the project using the Assets>Open C# Project menu. If everything is OK, you should see your project in the Explorer View.

Check Unity > Visual Studio connectivity

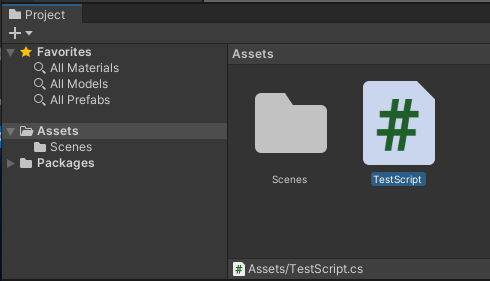
Now, we can close Visual Studio, and go back to unity, and let’s create a script : In the project window, navigate to the root of Assets, then right click in the empty space for files, and select Create/C# Script. Let’s name our file TestScript.

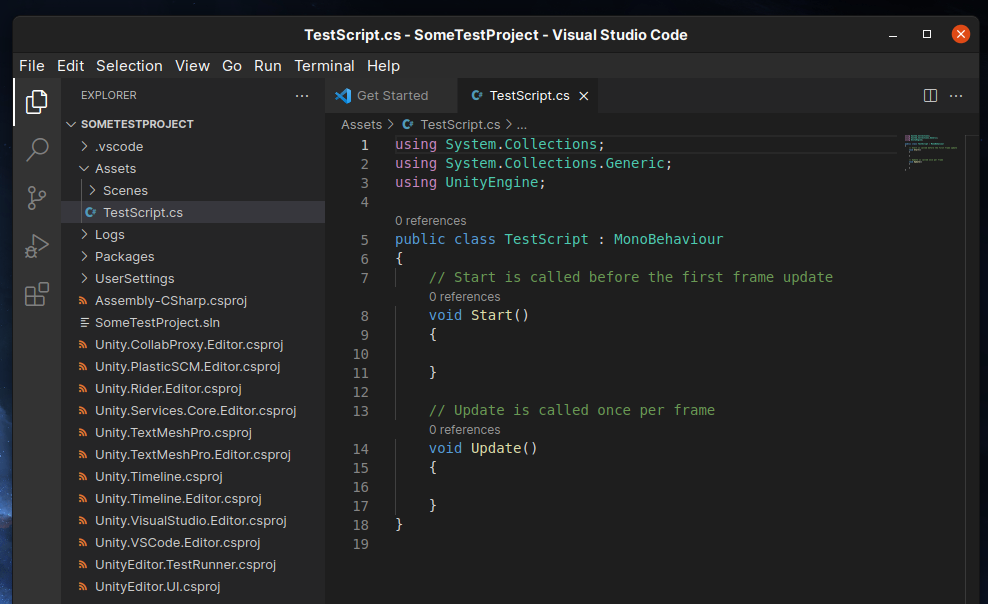
After some compilation, we can double click the file to open it in Visual Studio Code.

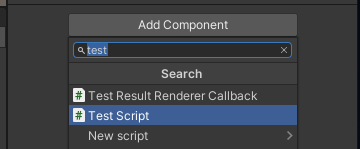
Back in unity, let’s create a sphere object in the scene : In the hierarchy window, click the + Button in the toolbar, and select 3D Object > Sphere. Then, with the sphere selected, use the Add Component button at the bottom of the inspector to add the Test Script we just created.

The Component should be added to the sphere.

Let’s go back to Visual Studio, and let’s modify the script so it looks like that:

using System.Collections;
using System.Collections.Generic;
using UnityEngine;

public class TestScript : MonoBehaviour
{
    void OnMouseDown()
    {
        Debug.Log("Clicked the Sphere!");
    }
}

Back in unity, let’s click the play button in the top toolbar. We shall be able to click the Play Button at the top, once playing, if we click the sphere we get the following messages in the console tab.

Clicked the Sphere!
UnityEngine.Debug:Log (object)
TestScript:OnMouseDown () (at Assets/TestScript.cs:9)
UnityEngine.SendMouseEvents:DoSendMouseEvents (int) (at /home/bokken/buildslave/unity/build/Modules/InputLegacy/MouseEvents.cs:161)

Once it is working, we can stop playing (Ctrl+P), and start making some breakpoints.

Setting up Breakpoints

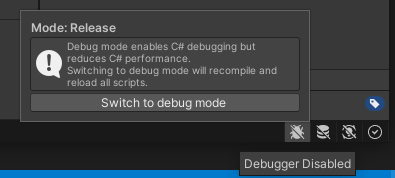
First, we will set Unity Editor into debug mode. To do so, in the bottom right corner, let’s click the Debug Mode button, and click “Switch to Debug Mode” if not already in debug mode.

Once enabled, it will reload the scripts, and appear as a yellow bug icon (gray icon is for release mode.)

Once debug mode is enabled, we can then attach Visual Studio to Unity. Let’s go back to Visual Studio. Here is where it gets a bit tricky.

Note : the following instructions depicts some workarounds required as for December 2021, they will probably be solved in the future.

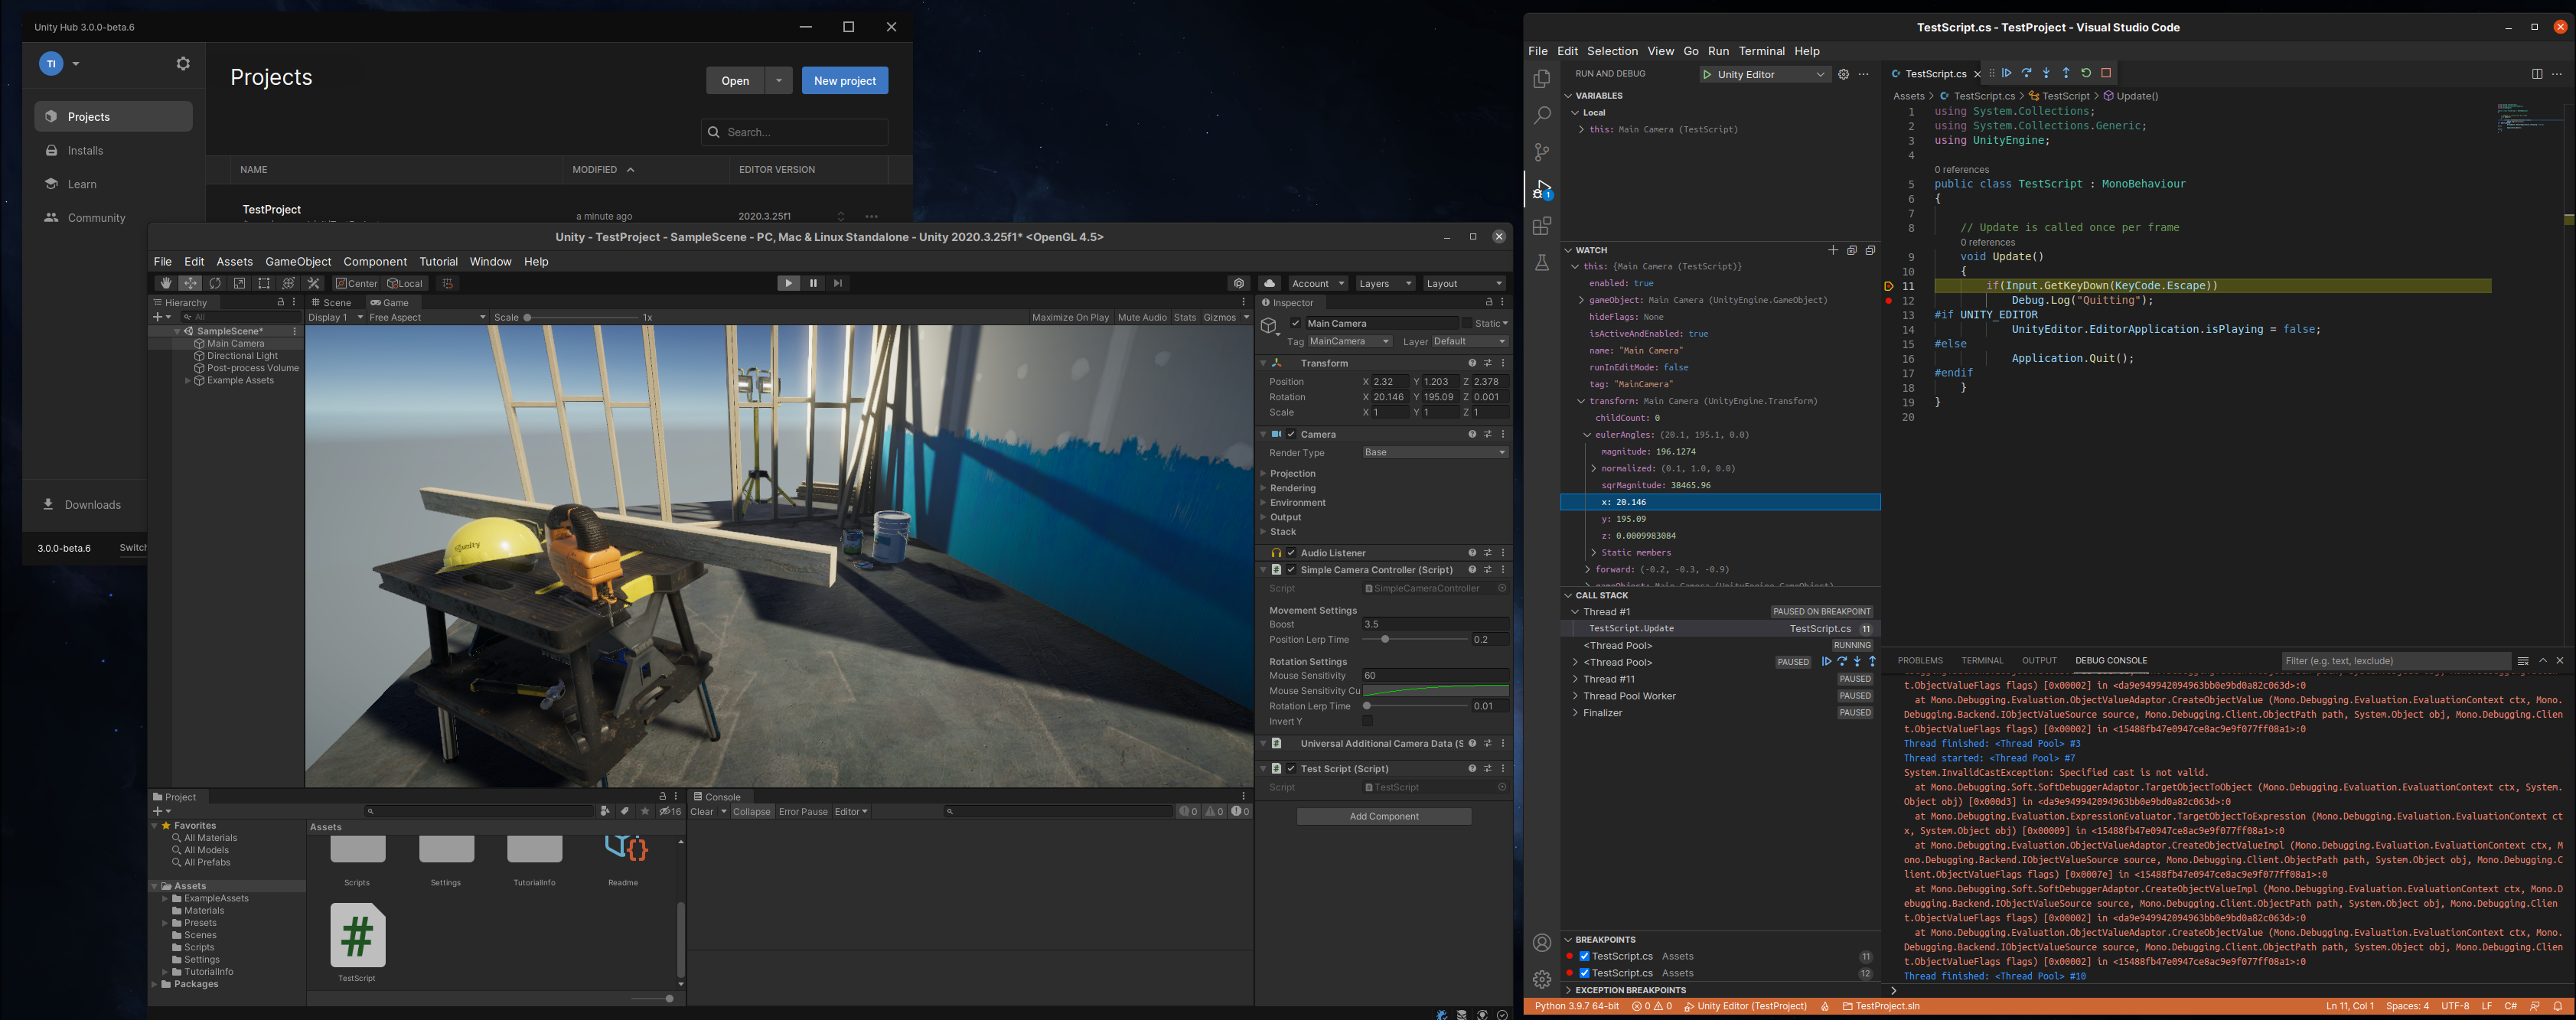
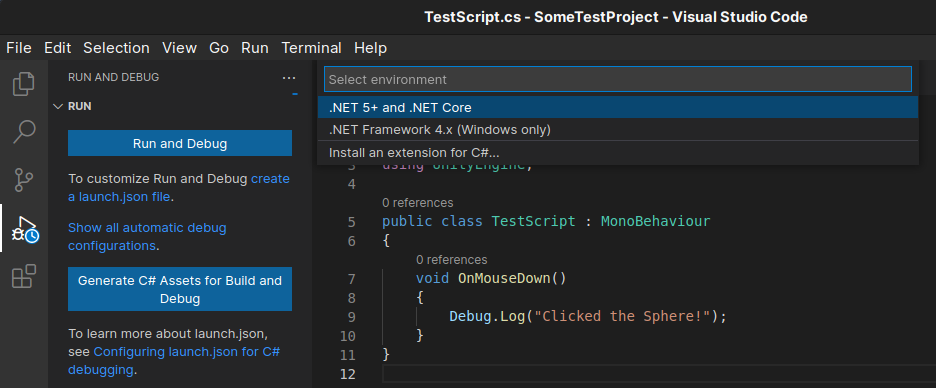
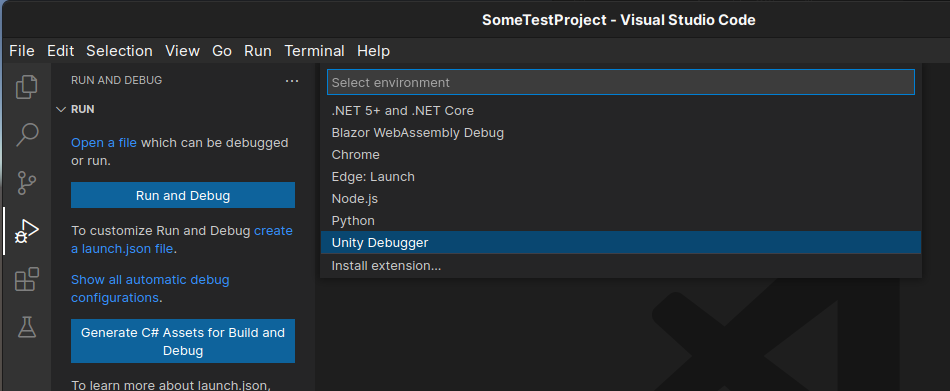
In Visual Studio, if we go to the debug tab (4th icon from the top in the left toolbar), then click Run and Debug we get this situation :

We are currently missing the entry to attach the Unity Debugger. And if we click the “Create a launch.json file” , we still don’t see the option.

But wait! Now, let’s just close all opened files, then retry.

Once created, the launch.json will display some configurations. Let’s save it first. Then click the Green Play Button in the Left Pane.

We should have this error:

The problem here is that our editor configuration path is badly configured by Visual Studio.

We have an absolute path in the Editor Configuration

    "configurations": [
        {
            "name": "Unity Editor",
            "type": "unity",
            "path": "/home/peeweek/git/SomeTestProject/Library/EditorInstance.json",
            "request": "launch"
        },

While we should have a relative path:

    "configurations": [
        {
            "name": "Unity Editor",
            "type": "unity",
            "path": "Library/EditorInstance.json",
            "request": "launch"
        },

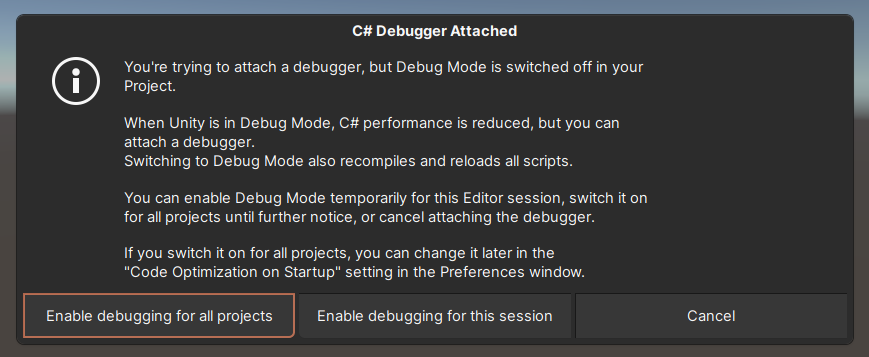
Clicking again, should try to attach to the editor. You should have a prompt from unity editor to switch to debug mode, let’s do so, either for all projects or for this session is fine.

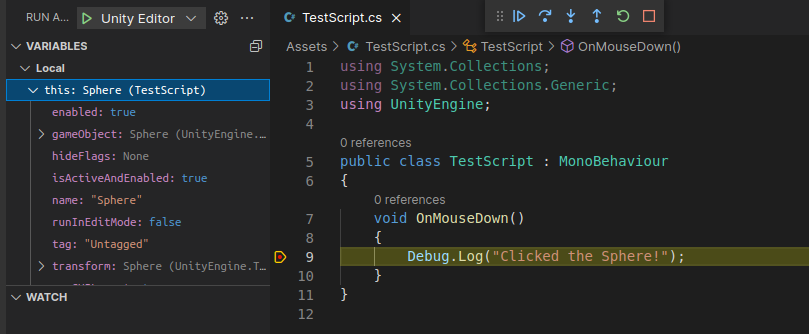
Once attached, you should have the debugger attached.

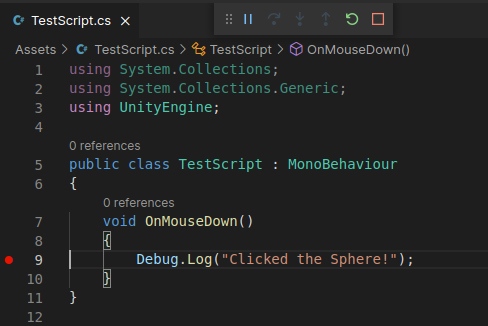
Going back to VS Code, let’s add a breakpoint to the Debug Log line.

Now, back at unity, let’s play, and click the sphere. We should reach the breakpoint.

Final Words, Takeaways

While this guide is a step by step and seem long, the install is not so complex but requires following directions thoroughly. It is yet, more complex to set up than a Windows dev environment, but we can hopefully see improvements in the future.

Below is just about everything you’ll need to style in the theme. Check the source code to see the many embedded elements within paragraphs.

Heading 1

images

Heading 2

Heading 3

Heading 4

Heading 5
Heading 6

Body text

Lorem ipsum dolor sit amet, test link adipiscing elit. This is strong. Nullam dignissim convallis est. Quisque aliquam.

Smithsonian Image

This is emphasized. Donec faucibus. Nunc iaculis suscipit dui. 53 = 125. Water is H2O. Nam sit amet sem. Aliquam libero nisi, imperdiet at, tincidunt nec, gravida vehicula, nisl. The New York Times (That’s a citation). Underline. Maecenas ornare tortor. Donec sed tellus eget sapien fringilla nonummy. Mauris a ante. Suspendisse quam sem, consequat at, commodo vitae, feugiat in, nunc. Morbi imperdiet augue quis tellus.

HTML and CSS are our tools. Mauris a ante. Suspendisse quam sem, consequat at, commodo vitae, feugiat in, nunc. Morbi imperdiet augue quis tellus. Praesent mattis, massa quis luctus fermentum, turpis mi volutpat justo, eu volutpat enim diam eget metus.

Blockquotes

Lorem ipsum dolor sit amet, test link adipiscing elit. Nullam dignissim convallis est. Quisque aliquam.

List Types

Ordered Lists

  1. Item one
    1. sub item one
    2. sub item two
    3. sub item three
  2. Item two

Unordered Lists

  • Item one
  • Item two
  • Item three

Tables

Header1 Header2 Header3
cell1 cell2 cell3
cell4 cell5 cell6
cell1 cell2 cell3
cell4 cell5 cell6
Foot1 Foot2 Foot3
{: rules=”groups”}    

Code Snippets

Syntax highlighting via Rouge

#container {
  float: left;
  margin: 0 -240px 0 0;
  width: 100%;
}

Non Pygments code example

<div id="awesome">
    <p>This is great isn't it?</p>
</div>

Buttons

Make any link standout more when applying the .btn class.

<a href="#" class="btn btn-success">Success Button</a>
Primary Button
Success Button
Warning Button
Danger Button
Info Button